Final Fantasy XIV Guide: Dragon Quest and FF XI Event Walkthroughs
You got your Dragon Quest in my Final Fantasy! Find out how to score yourself some puff-puff in Square Enix's rebooted MMO.
This article first appeared on USgamer, a partner publication of VG247. Some content, such as this article, has been migrated to VG247 for posterity after USgamer's closure - but it has not been edited or further vetted by the VG247 team.
Two special events are currently running in Final Fantasy XIV's reborn realm of Eorzea, celebrating Dragon Quest X and Final Fantasy XI respectively.
Here's how to complete both events and score yourself some... interesting rewards in the process.
Burgeoning Dread (Final Fantasy XI)
Required level: 10
Strange things are afoot in Eorzea! Rumors abound that another Calamity is incoming, following reports of strange happenings in all corners of the realm with a shadowy figure at their epicenter. Time to investigate!
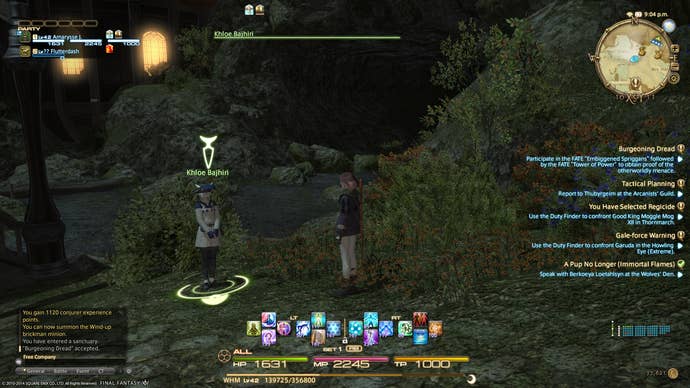
First things first, head over to New Gridania and speak with Khloe Bajhiri, reporter for The Raven. She's at X:10, Y:11, just north-east of the city's Aetheryte. Khloe will give you the rundown on what's happening and send you off to investigate some of the strange happenings that have been reported. Doing so involves completing two specific FATEs one after the other -- complete one, and the next one will start up. It's worth noting that you only need to participate in the FATEs rather than obtain a gold medal.
Next, pick where you're going to go. If you're high level, it doesn't matter so much as you can simply level-sync down to the level of the FATE you attend, but if you've not yet reached 50 you'll want to make sure you go to an appropriately levelled area. The possibilities are X:12, Y: 26 in East Shroud near Fullflower Comb; X:15, Y:30 in South Shroud, just south-west of Camp Tranquil; X:25, Y:19 in Western Thanalan, just south-east of Horizon; X:14, Y:38 in Southern Thanalan, south of Forgotten Springs; X:15, Y:12 in Middle La Noscea's Foremast area; or X:30, Y:34 in Eastern La Noscea a little way south of Costa del Sol. As a general rule, if the monsters in the area are significantly higher level than you, the FATE will probably be too difficult for you, so try one of the other areas. You may also wish to try one of the other areas if you find yourself waiting for it to appear and there's no sign of it.
The first FATE is called Embiggened Spriggans and sees you fighting a Spriggan golem similar to the Copperbell Mines Hard Mode boss. He's fairly easy to take down, though if you're the first person on the scene and you're not a tank you will probably want to call for some backup before engaging as the boss is a somewhat tenacious opponent. He does stop to charge up a cone-area attack every so often, though; you can use this period to put some distance between you and him if you do find yourself attracting his ire. If you are a tank, conversely, make good use of your cooldown abilities to maintain a solid defense and the boss' attention, and hope there's a healer nearby willing to patch up your wounds regularly. Dodge the cone area attack when it appears as it packs a hefty punch, but otherwise this is a straightforward fight -- just watch out for the additional smaller Spriggans who also spawn around the area, as you can easily get overwhelmed if you attract their attention as well as the boss.
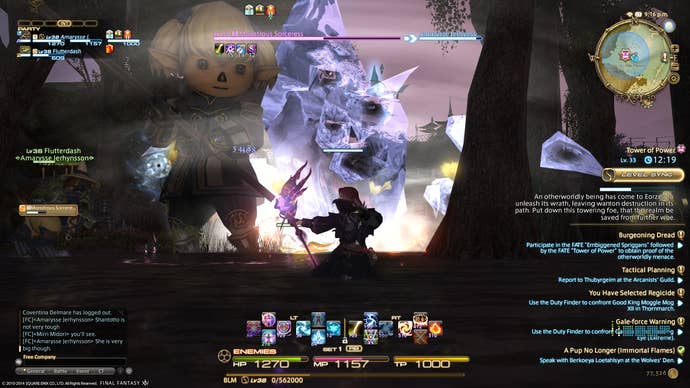
Upon successfully completing Embiggened Spriggans, the next FATE, known as Tower of Power, immediately spawns. Here, you must defeat a monstrously-sized version of Final Fantasy XI's Shantotto, who casts numerous high-level area-effect spells randomly about the area, regardless of who she is targeting. Most of these are very easy to avoid, though her "Thwack!" physical attack hits hard and has a very rapid charge time, so try and avoid getting too close if you want to avoid this. Wear her down gradually and you'll eventually be rewarded with a Dainty Doll.
Now head back to New Gridania, and the Twin Adder headquarters at X:9, Y:11. Hand the Dainty Doll to Vorsaile Heuloix and explain the situation, after which the truth behind Shantotto's apparent appearance in Eorzea will be revealed. Once the cutscene finishes, you'll be rewarded with your very own pocket-sized Shantotto minion to use as you see fit -- but beware; as the diminutive black mage herself says, "if you fail to treat her right, she will set your pants alight." What that means for those who are currently equipped with a subligar or the Colosseum gear doesn't bear thinking about.
Breaking Brick Mountains (Dragon Quest X)
Required level: 7
Golems are no strangers to Eorzea, but these ones that have recently appeared are... different somehow. The Amajina & Sons Mineral Concern is particularly interested in these new appearances, since they appear to be composed of minerals that have previously not been seen in Eorzea. But what is the truth behind them? Time to find out.
First up, head to Ul'Dah's Steps of Nald area and speak with Havak Alvak of the Mythril Eye. He's standing near the Gate of Nald at X:12, Y:8, and will fill you in on the situation, after which he'll instruct you to go and speak with a "Beefy Businessman." You can find the strangely dressed gentleman at X:8, Y:12 in the same region.
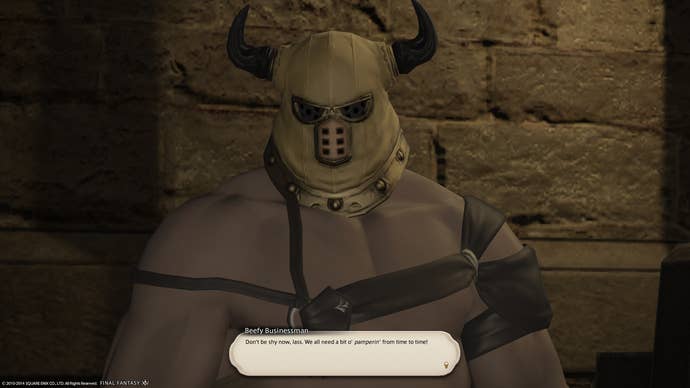
Answer the Beefy Businessman's question in the affirmative and he'll ask you to bring him back a chunk of rubble from the golems that have been spotted around Eorzea. In order to do so, you'll once again need to participate in two back-to-back FATEs in one of several areas depending on your level. The second FATE varies slightly depending on which area you go to -- you'll either fight a Stone or Gold Brick golem.
You'll find the FATEs in question at any of the following locations: Central Thanalan's Sil'dih Excavation Site (X:17, Y:23); Lower La Noscea's Blind Iron Mines (X:27, Y:17); Upper La Noscea's Bronze Lake (X:34, Y:24, east of Camp Bronze Lake); the Central Shroud at X:23, Y:23, just south-east of Bentbranch Meadows; or at Finder's Bluff in the North Shroud (X:15, Y:31).
The first FATE involves fending off a horde of small, weak golems and shouldn't present too much of a difficulty even for a solo adventurer -- assuming you arrive at the FATE with plenty of time to spare. Five minutes is approximately enough time for a single adventurer to defeat enough golems to complete the FATE and trigger the second part; you'll need less time if you have friends with you.
The second FATE involves fighting a single large golem. This is a reasonably straightforward fight, but he has some hard-hitting area of effect attacks with a wide radius, so do your best to stay out of those when they appear. Aside from that, the battle shouldn't present you with too much difficulty -- though like the battles in the Final Fantasy XI questline, you probably won't want to take on the boss alone, even if you successfully fended off the golem horde by yourself. A healer is pretty much essential; it is possible to defeat the boss through kiting while other damage dealers throw everything they have at it, but it's much easier if one person can stand and take the brunt of the damage while everyone else hurls explodey and/or pointy things as fast as they can.
You only need to participate in the two parts of the FATE to receive the chunk of rubble required to complete the quest -- there's no requirement to attain a Gold medal or anything. You can even do the two parts at different times -- if you participate in the first part but fail to defeat enough golems in the time limit, for example, you can later show up to the second part in a completely different area to finish off the quest. You'll receive a Brickman Chunk for your troubles when you've participated in both parts.
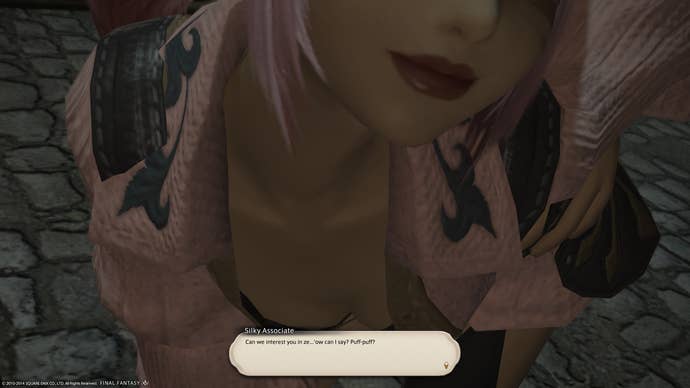
Once the Brickman Chunk is safely in your Key Items inventory, return to the Beefy Businessman in Ul'Dah, and his provocatively dressed associates standing nearby will provide you with a reward that will likely be all too familiar to Dragon Quest fans. And you're done!
