The Witcher 3 Griffin School Gear - Where to Find the Griffin School Armor
Here's where to find the Griffin School Gear and Armor in The Witcher 3.
This page will outline the locations of all six diagrams required to complete the Griffin School Gear set in The Witcher 3: Wild Hunt, as well as the Enhanced, Superior and Mastercrafted versions.
We'll be breaking down where you can find all the The Witcher 3 Griffin School Gear and Weapons, so you can track down every diagram as easily as possible.
- The Witcher 3: Where to find all the Griffin School Gear
- The Witcher 3 Griffin Weapons Diagram Locations
- The Witcher 3 Basic Griffin Gear Diagram Locations
- The Witcher 3 Enhanced Griffin Gear Diagram Locations
- The Witcher 3 Superior Griffin Gear Diagram Locations
- The Witcher 3 Mastercrafted Griffin Gear Diagram Locations
The Witcher 3: Where to find all the Griffin School Gear
As you might expect, the Griffin School Gear gets harder to find and collect as it gets stronger in The Witcher 3, which makes the gear a perfect fit for someone around level 15. The enhanced version can then be used to hold you over until about level 19, and you should always be looking to find a more suitable weapons and armor for Geralt.
Collecting the diagrams is only part of the process. You must also possess the materials to craft each piece of gear, and locate an armorer or blacksmith who is skilled enough to get the job done. If you’ve been playing and looting for quite some time, that part should only be a minor inconvenience. If you are missing one of the components needed to craft an item, see if there is something that you can dismantle. For example, a Nekker Eye can be dismantled to create a Monster Eye, one of the necessary components in the Griffin Gear you're about to track down.
It should also be noted that in order to craft the enhanced, superior and the mastercrafted versions of this gear, you must have the base gear before it. To be more specific, you cannot craft the enhanced version of the Griffin Gear if you do no have the base version of the gear already in your inventory. Be sure to read the diagrams before crafting gear, making sure that your witcher is a high enough level to equip it. Don't just check one item, as you will find that you swords might require one level, but your armor might only be available at a higher level. Spend a moment reading the diagrams before you start the building process.
The Witcher 3 Griffin Weapons Diagram Locations
Griffin Steel Sword Diagram
North of the Hangman’s Tree signpost will be another called Hindhold. If you don’t see it on your map, it just means you haven’t been there, so ride north from Hangman’s tree towards the question marks that will likely stand in its place. You actually need to continue north when the road splits to the left and right, so prepare to do some off-roading. When you arrive at some stone ruins you’ll know you’re there, and you’ll have to head inside to get the loot you’re looking for.
Expect to meet some resistance here, including a harpy monster nest that you’ll need to destroy. When that’s done, look for a nearby door, going in and looting the room. You’re sure to find some cool things, but the prize that you went through all this trouble for is the Griffin Steel Sword diagram. Grab it and head back to the now unlocked signpost to fast travel to your next destination.
Griffin Silver Sword Diagram
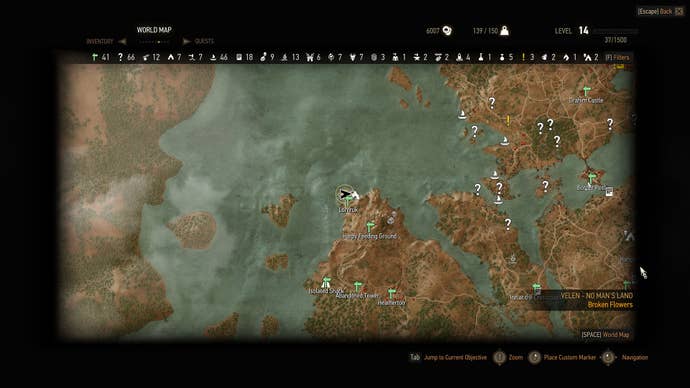
The Inn at the Crossroads sits on an island that’s between two land masses. You’re going to be going to the far northwest shores of the one that is to your left when you’re looking down at the map. If you have unlocked the Harpy Feeding Ground signpost, you can just fast travel there and keep going north.
When you arrive the drawbridge will likely be up, meaning you’ll have to find another way to get across. You also might have to deal with a monster that is protecting this area, but you shouldn’t have much trouble with it.
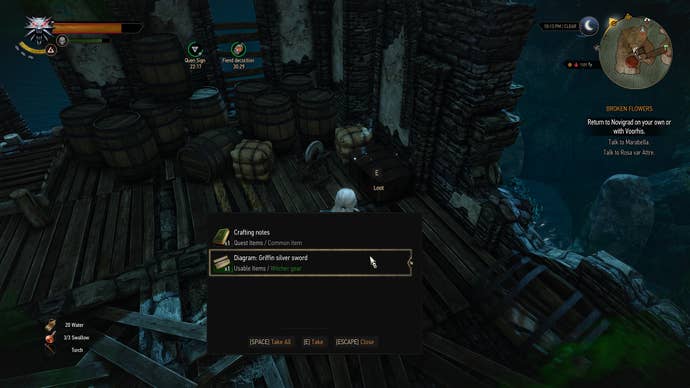
Hop into the water on the east side of the island, being sure to snatch up the magic from the Place of Power that lets you know you’re in the right location. Move around in the water a bit until a cave entrance is marked on your mini map, then swim under water and through the opening. You’ll be harassed by a few drowners at this point, but you can just swim past them to your objective.
Once you’re inside the cave, climb up until you go out a door and can turn the wheel to lower the bridge. Do this to make your escape much easier, then climb the ladder next to the door. This should lead you to a platform with a chest, and inside of it will be the diagram for the Griffin Silver Sword. Feel free to keep looting up around here before you leave. There are many other cool things to find besides the diagram.
The Witcher 3 Basic Griffin Gear Diagram Locations
You're fortunately able to find all of the basic Griffin Gear diagrams in one location in The Witcher 3.
Griffin Armor: Trousers, Boots and Gauntlets
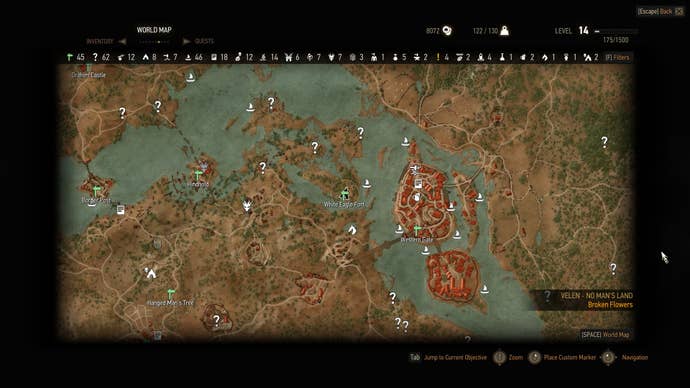
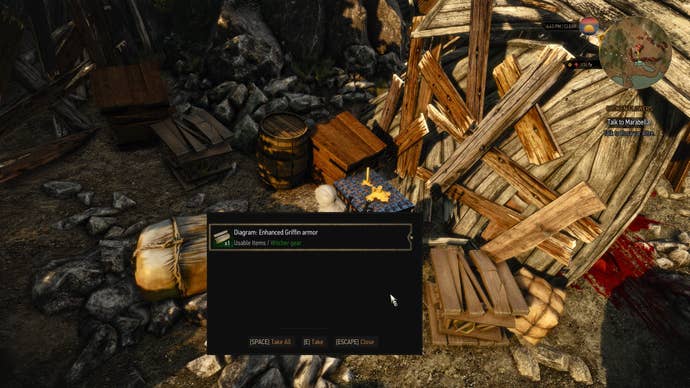
You’ll find the final location you need to visit in Crookback Bog. If you have the Downwarren signpost, you need to fast travel there and then go east, with a bit of an adjustment to the north. You should see a question mark on your map, and if you don’t you should see a signpost called Dragonslayer’s Grotto. That is your current objective.
If there are any creatures outside, dispatch them and head in, making sure that you have Yrden ready to go. There will be several wraiths, as well as an ekimmara that you’ll need to deal with. All of them are weak to your Yrden sign, so toss it on the floor and draw them close before finishing them off. Even take time to explore the side rooms, as there are many more bits of treasure here than just the diagrams.
As you blast your way through weakened walls to get close to the ekimmara using Aard, switch back to Yrden and defeat the beast. Use your Witcher Senses to locate the loot, going for a chest that contains all four of the remaining diagrams you seek. These include the Griffin Armor, Griffin Trousers, Griffin Boots and Griffin Gauntlets.
The Witcher 3 Enhanced Griffin Gear Diagram Locations
Griffin Steel Sword - Enhanced Location
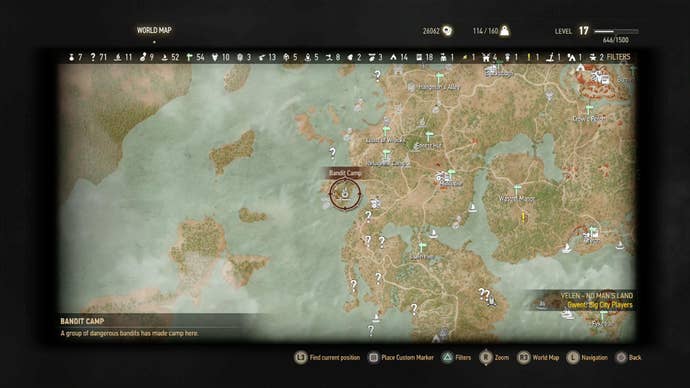
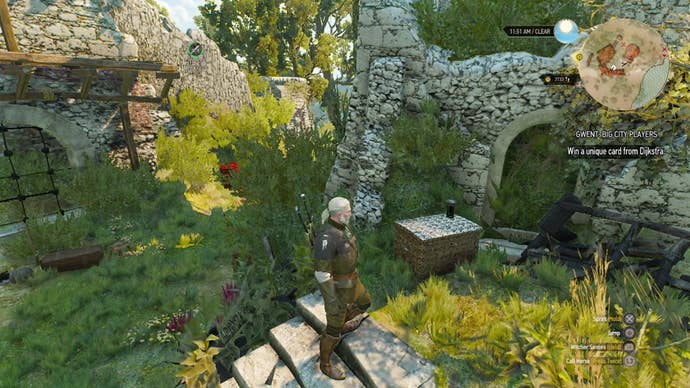
To obtain this sword, head to the very west of Velen, southwest from the Refugees Camp signpost. If you don't have that unlocked, it's west of the Midcopse signpost. You'll find the enchanced Griffin Steel Sword diagram in a chest in the middle of the ruins that the bandits were using as a camp.
Griffin Silver Sword - Enhanced Location
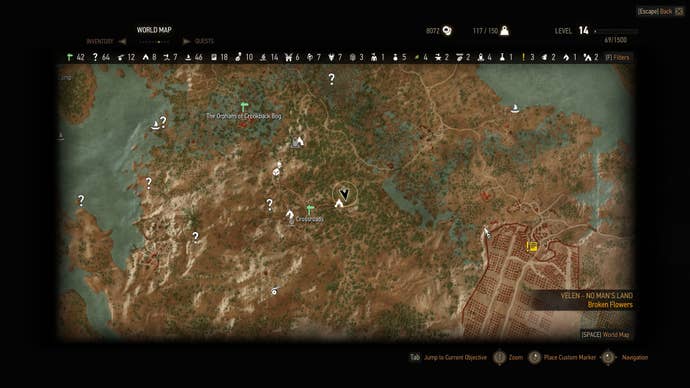
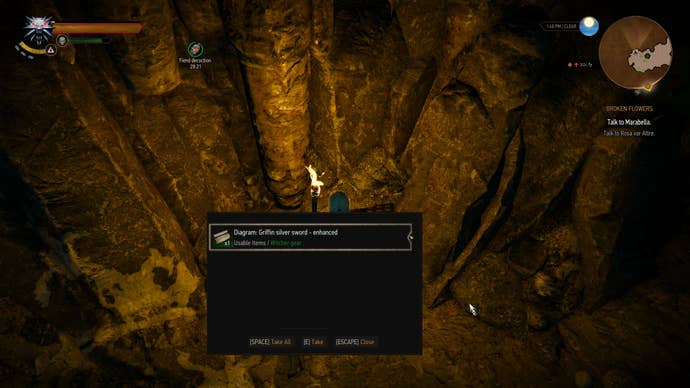
Fast travel to the Crossroads signpost and start heading along the road that runs to the east. Follow it until you reach a cave, going inside and moving all the way to the back. You'll spot the chest with the enhanced Griffin Silver Sword diagram if you use your Witcher Senses.
Griffin Chest Armor - Enhanced Location


For those wondering, this is the chest armor. It's located to the west of the Oxenfurt Harbor signpost, across the water and west of a boat icon that should be just off the nearby island (You want the big island, not the little one). Travel to this location (it's called White Eagle Fort) and speak with an entertaining rock troll (he won't hurt you). The chest with the enhanced Griffin Armor diagram is in the chest behind him.
Griffin Gauntlets - Enhanced Location
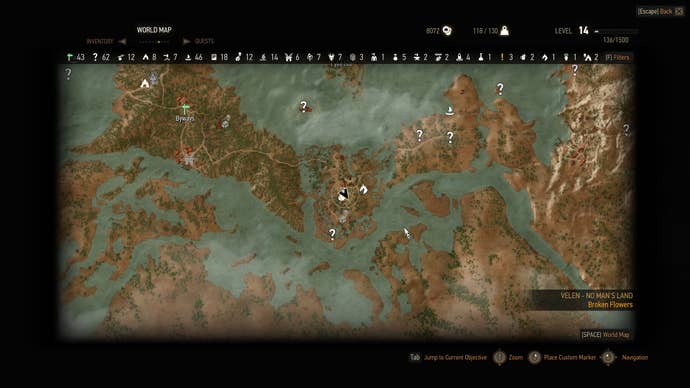
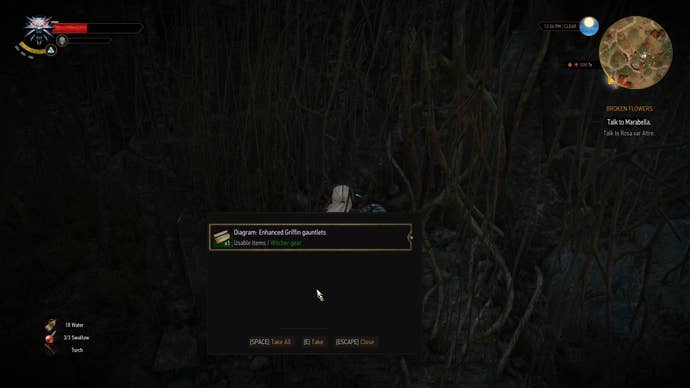
This bit of armor is in the far south of Velen, very near to the Frischlow signpost. It's also southeast of the Byways signpost if you would rather start from there. When you arrive, look for a cave that is blocked by some rubble. Use Aard to smash it open, then snag the enhanced Griffin Gauntlets diagram from the chest in the small chamber.
Griffin Boots - Enhanced Location
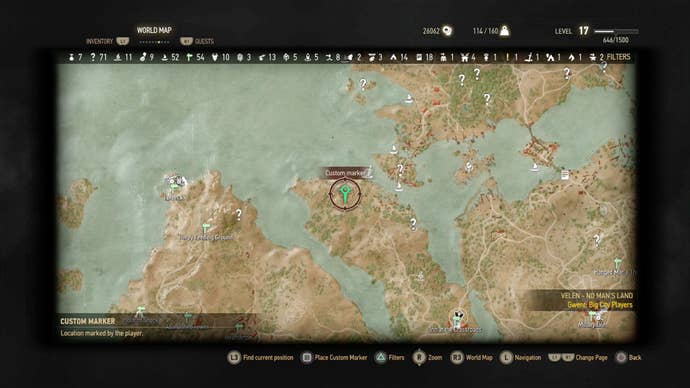
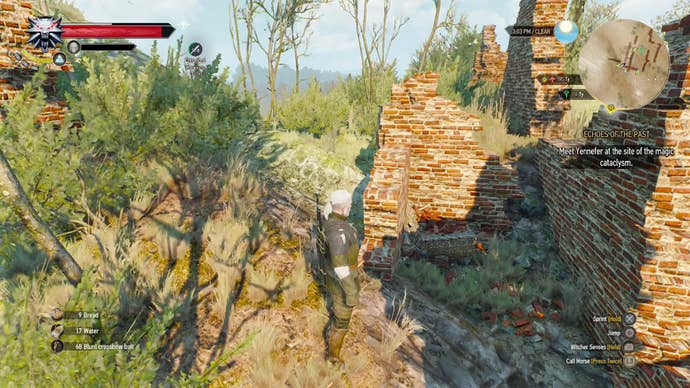
The boots for this set are found at the northwest part of the island that the Inn at the Crossroads is located. It's also east (and slightly north and across the water) from the Harpy Feeding Ground signpost that you are likely familiar with. You're looking for a broken brick building, and you're likely going to be attacked by some type of flying beast that isn't a griffin. You'll find the enhanced Griffin Boots diagram between some of the broken brick walls.
Griffin Trousers - Enhanced Location
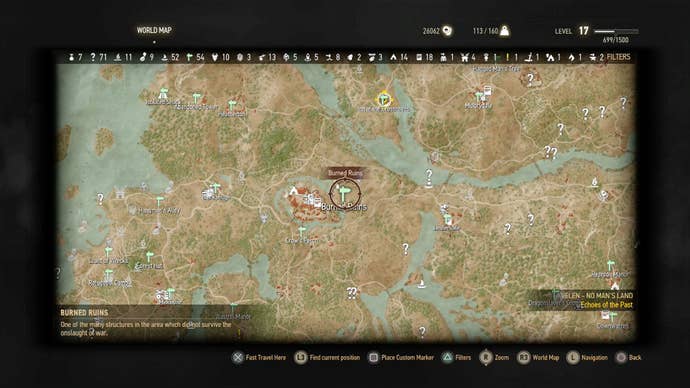
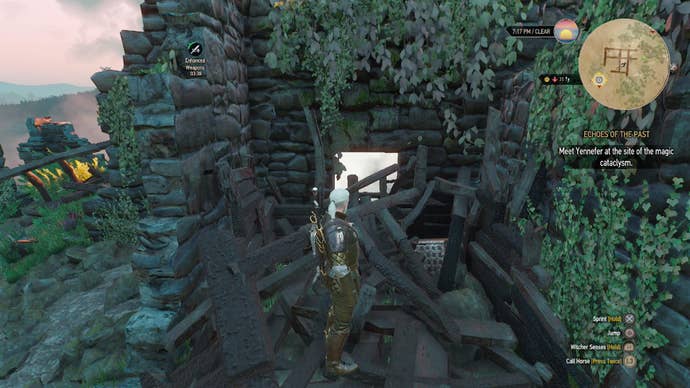
Finally, something easy. Fast travel to the Crow's Perch signpost. If you don't have that, you don't need to be searching for this armor. To the northwest is the Burned Ruins signpost, and that's the location of the final piece of armor for this set. Look for a burned and destroyed building, and inside - under some rubble - will be the chest you're looking for. Try using Aard to clear a path, then snatch the enhanced Griffin Trousers diagram.
The Witcher 3 Superior Griffin Gear Diagram Locations
Griffin Armor: Trousers, Boots, Gauntlets – Superior Locations
There are several signposts that we can use as reference here, the first being Rogne. That of course means you are going to be on Ard Skellig, the biggest of the Skellige Isles. From there you want to head east. If you have the Yustianna’s Grotto or Giants Toes signposts, fast travel to the latter if possible, the former if you it’s the only one available.
The location you are looking for is directly north of the Giants Toes signpost. Rid the bandit camp of all its occupants, then look for a wrecked boat along the shore. You will find the superior diagrams for the Griffin Armor, Griffin Trousers, Griffin Boots and Griffin Gauntlets. From there, head back to the nearest signpost so that you can grab the two swords needed to complete this set.
Griffin Steel Sword – Superior Diagram
Sticking with the Skellige Isles, fast travel to Urialla Harbor on An Skellig. If that’s not an option, go for the Trail to Yngvar’s Fang. If neither are showing, well, get a boat and start paddling. However you get there, start at the Urialla Harbor signpost on central southern shore of the island and start making your way to the northwest. You should see a village on your map and a road that runs by the village to the north. Take that road all the way to the end and until you see a shrine. Take out any bandits that are about, then grab the superior Griffin Steel Sword diagram from behind it.
Griffin Silver Sword – Superior Diagram
You’re headed back to Ard Skellig of the Skellige Isles. This time you’re looking for a signpost called the Elverum Lighthouse. If you have it, save yourself a trip by horseback and just fast travel there. If you do not have it, fast travel to Kaer Muire and head to the most southeast tip of the island. When you get close, look for a cave marker to pop up on your map, then head inside and dispatch the bears that are calling this place their home. Use your Witcher Senses to find the chest with the superior Griffin Silver Sword diagram, then loot the bear’s bodies. They often hold valuable crafting components for the Bear School Gear that we covered in another article.
The Witcher 3 Mastercrafted Griffin Gear Diagram Locations
Griffin Armor, Trousers, Boots, Gauntlets – Mastercrafted Locations
All four pieces of armor are found in Ard Skellig of the Skellige Isles. Your best bet is to head directly east of the Abandoned Sawmill, looking for a Place of Power when you reach the coast. However, if you have the Redgill signpost unlocked, simply take the road that runs north until you reach your objective.
When you arrive at a fort, try to avoid the cyclops and head inside. Take the stairs on the left and go to the second floor, looting all of the chests until you find the mastercrafted Griffin Armor, Griffin Trousers, Griffin Boots and Griffin Gauntlets diagrams.
Griffin Steel Sword – Mastercrafted Diagram
Sticking with Ard Skellig, look for the Boxholm signpost. If you don’t have that, you can use the Fyresdal signpost and head north, or the Palisade signpost and head northwest over the mountain. Either way, you need to get to Boxholm. When you arrive, move to the eastern side of the ruins, spotting some rubble that will contain your mastercrafted Griffin Steel Sword diagram. If you’re having issues spotting it, use your Witcher Senses to guide you.
Griffin Silver Sword – Mastercrafted Diagram
You should still be on Ard Skellig if you’re trying to do these in order. If that’s the case, look for the Fornhala, Fayrlund and Fyresdal signposts. The spot you’re looking for is on the east side of a lake that sits at the west foot of a mountain, between those three locations. You’ll know you’re in the right spot when you see some stone ruins, including a tower that has begun to crumble. Head through the door and use your Witcher Senses to track down the mastercrafted Griffin Silver Sword diagram.
Whether you're just starting The Witcher 3 for the first time or need a refresh after a long time out of the saddle, check out our Witcher 3 walkthrough for all the essential info, including how to get the best ending. We also have a Blood and Wine walkthrough, and Hearts of Stone walkthrough, if you're making your way through the DLC.
