Silent Hill 2 Lake View Hotel guide
At long last, James has finally reached the Lake View Hotel in Silent Hill 2.
James Sunderland has been on quite the journey so far in Silent Hill 2, but we’re finally nearing a close. That said, we still have a few more things to do before James finally reaches some conclusion about all of the goings-on in Silent Hill, and we’ll be wrapping these up at the Lake View Hotel.
A gorgeous hotel that, while frightening at times, is a real treat to explore. Especially given the hellscape that is Toluca Prison and the Labyrinth, enjoy the slight serenity that Lake View Hotel provides while you can. Without further ado, here’s our Silent Hill 2 Lake View Hotel guide.
Silent Hill 2 Lake View Hotel guide
After paddling across Toluca Lake and arriving at Lake View Hotel, grab the Garden map and head upstairs.
- In New Game Plus, a sci-fi sound effect will play as you arrive at the pier if you have the Blue Gem in your possession. Investigate it here to be one step closer to unlocking the UFO ending.
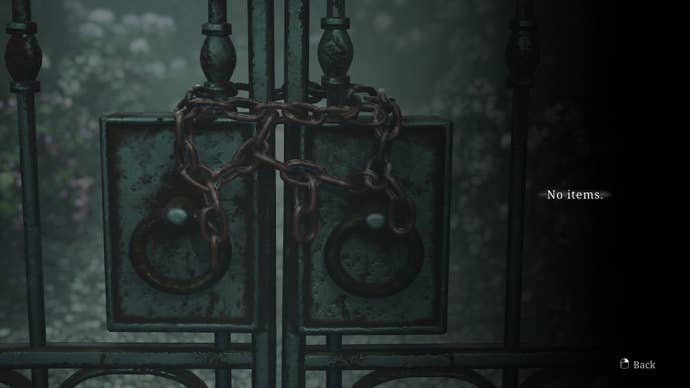
If you explore the Garden, you’ll find three statues. Though, one of them is inaccessible thanks to a chained gate. We’ll come back here later, obviously.
Enter the hotel and collect the map from the leaflet stand, then head into the Reception Office, where you will find a save checkpoint. Our ultimate goal in the hotel is to reach Room 312, but it’ll be a while until we can get there.
In Reception, there is a Receptionist Memo that advises that James’ videotape is in the Employee Section of 1F. You can also collect the Room 312 Key and Ornamental Key from the Key Locker.
Use the Ornamental Key to unlock the Music Box in the lobby, and you’ll find that this particular puzzle requires three figurines before we can solve it.
Up next, enter the Lake Shore Restaurant, where you will have a cutscene with Laura. When you’re done there, follow Laura out of the room and make your way to Cafe Toluca. Here, you can grab the Room 102 Key from behind the bar. For what it’s worth, Room 102 has some supplies to collect, but you can skip it entirely if you don’t fancy grabbing them.
If you break the wall that is around the side of the bar, you can enter Lost and Found. In here, there’ll be a note referencing a strange book.
- In New Game Plus, the note referencing the strange book is replaced with the Lost Memories Book needed to unlock the Rebirth ending.
If you head towards Room 101 - which contains a funeral card for Sean Mitchell and not much else - there’s a gap in the wall you can crawl through to access Room 103. From 103, you can then use the balcony to access Room 106 and collect supplies.
Enter Utility Room 1F next and collect the Sunrise Wing Key from the table in here. Then, head up to 2F and use the key on the eastern wing of the hotel.
After going through the double doors, enter the Reading Room on your right and collect the four books from around the room. We then need to place these on the bookshelf so that the symbols on the spines of the book match the large painting on the opposite wall.
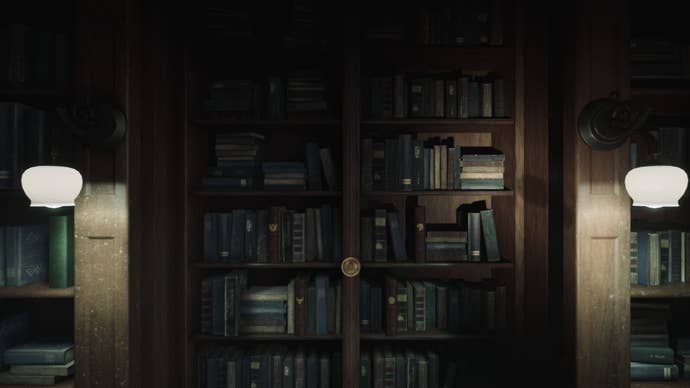
From left to right and top to bottom, the answer is Wings, Eagle, Bull, Lion. If you're still troubled by the puzzle, take a look at our Reading Room bookshelf puzzle guide.
This will then reveal a secret room with the Vanity Mirror puzzle, three photographs, and a locked suitcase with two combination locks.
The three photographs provide hints as to where we will find items to create an improvisational blacklight. We can then put this into the mirror to reveal what we need to do next. So, let’s get going.
Exit the Reading Room and jump into the Cloakroom across from you. Unlock the large door in this room to access the Hall, which is full of literal and monstrous Mannequins. Collect the Room 202 Key from the sofa, and the Ripe Apple from the southwest corner of the room.
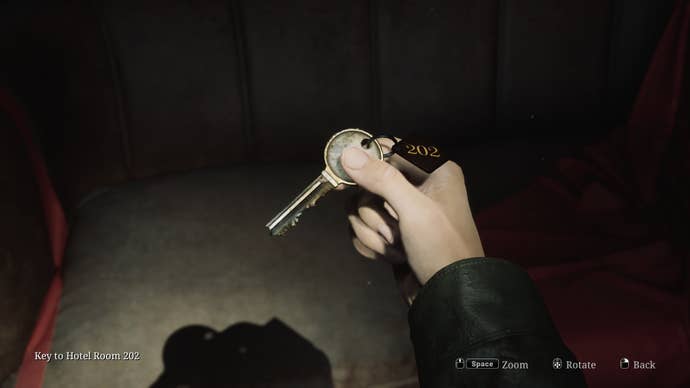
Then, use the balcony to access the Nurse’s Office. Kill the nurse here and interact with the M.S.S. Medical Record on the desk, if you want. Though, you can’t read it.
Exit and unlock the door to the stairwell. We now have access to the western wing on 2F. Next, use the Room 202 Key to enter 202.
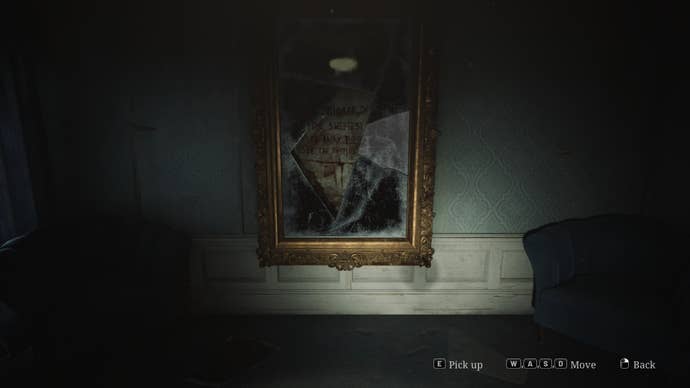
In here, there is a broken mirror with a poem beneath it, as well as a small, circular table. First things first, go into the bedroom and collect the glass shard from the bed. Then, place the Ripe Apple on the table.
Now, using the glass on the floor and the piece in your inventory, put the mirror back together.
Once the mirror is fixed and begins to ripple, enter Room 201. You can collect our first figurine - Snow White - from the table. Go ahead and place it in the Music Box on 1F, and save your game.
Up next, make your way to the western wing on 2F, and take the stairs up to 3F. Enter the Conference Room, where there is a locked fireplace. You will, however, be able to read the Cleaning Staff Note and retrieve the Room 107 Key from the edge of the fireplace.
Guess where we’re going next? Well, it’s not Room 107 just yet. Before you go there, enter the 3F Utility Room and collect the Bolt Cutters, then make your way to Room 107.
Once in Room 107, go outside. There’ll be a lot of enemies here, but we want to reach the gazebo in the southeast corner of the garden and retrieve the Fireplace Key. I then recommend heading back inside, and while we’re on 1F, head out into the main Garden.
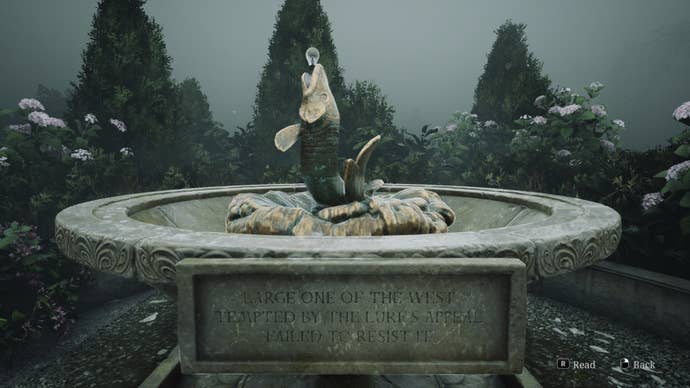
Remember the chained gate from earlier? Use the Bolt Cutters on it and head over to the fish statue, and then collect the Light Bulb from its mouth.
Now, before we return to the fireplace in the Conference Room, make your way to Room 318 and 319. If you look at your map, you can go south of these to find some stairs that allow you to access Room 217.
As you enter Room 217, though, a loud crash is heard. Somehow, a bedside table has been flung outside, alongside a book. On Light difficulty puzzles, the book will have landed in the Lake Shore Restaurant. On Standard difficulty puzzles, however, you will need to shoot the skylight just outside of Room 217, and then the book will land in the restaurant.
From here, you can enter Room 215 to unlock and access a shortcut leading back to the rest of 2F. Before we forget, I recommend nipping down to the Lake Shore Restaurant and interacting with the book. James will open it, revealing a Can Opener. This will come in handy soon.
Finally, return to 3F via the stairwell in the western wing on 2F, and enter the Conference Room again. Unlock the fireplace to retrieve our second figurine — Cinderella — but don’t feel too relieved. As James retrieves the item, a Mandarin will come crashing through the walls.
Fortunately, this boss fight isn’t really much of a boss fight. Mandarin’s will whip James with their tentacles at intervals, but they’re not too troublesome otherwise. Use the Shotgun to shoot its arms that are attached to the ceiling and it’ll fall to the ground, where you can shoot it further. Overall, it only takes a few pumps of the shotgun to actually kill this thing.
Move the shelf at the end of the room, and break the wall to enter the following room. Exit via the balcony and make your way to Room 318, where you will be able to collect the Red Paint Can. Combine this with the Can Opener in your inventory to open it, and then combine the Red Paint with the Light Bulb to create our improvisational blacklight.
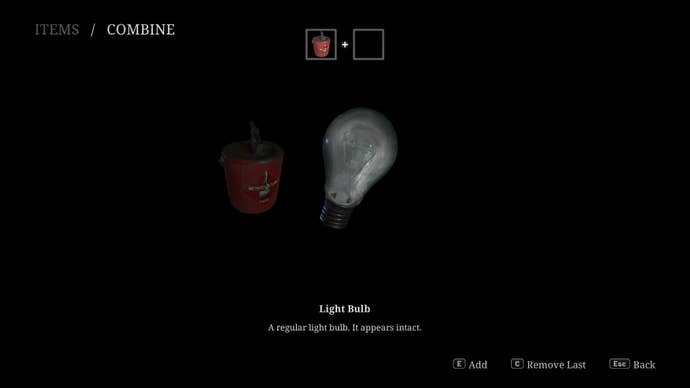
Now, return to the Vanity Mirror in the Reading Room on 2F and place the bulb. This will reveal a code written in paint on the mirror, that can be input into the briefcase here.
- Light puzzle solution: DARK WISH
- Standard puzzle solution: DEED DONE
- Hard puzzle solution: LOVE LUST
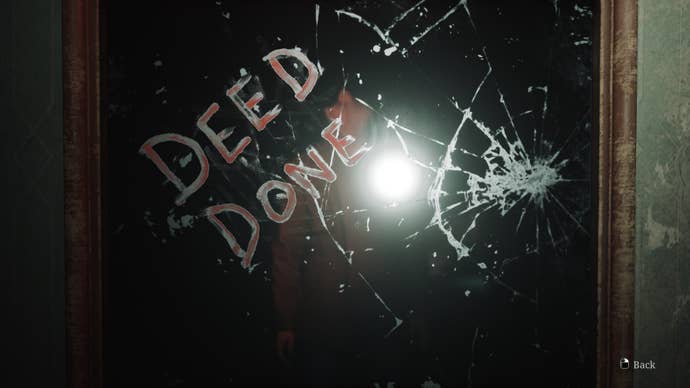
Collect the Employee Elevator Key from the briefcase. Then, make your way to 2F and enter the elevator (there will be another save checkpoint here that I highly recommend using). When you enter the elevator, it will very quickly start blaring alarms and signaling that you’re over the weight limit.
Deposit all of James’ items into the cupboard in the room. Rather interestingly, the only thing you can take with you that won’t push you over the limit is your Personal Items.
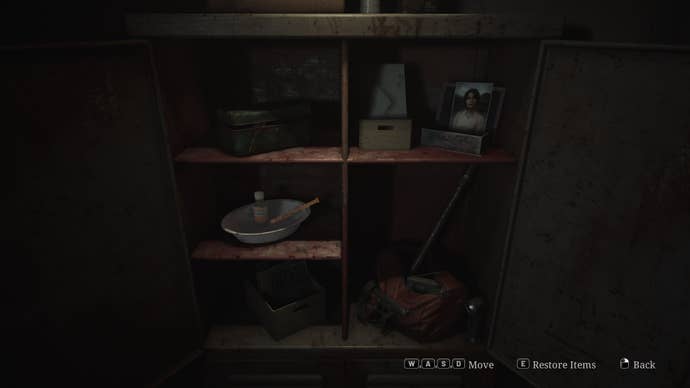
- Taking, or not taking, the Personal Items into the Employee Elevator with you could influence your ending. Though, provided you have or haven’t done other things mentioned in this guide — in relation to endings — it doesn’t seem like this act in and of itself has too much of a bearing.
After riding the elevator, enter the room up ahead and grab the map for the Employee Section. You’ll also notice that there are two Mandarin’s stalking the halls; you need to avoid these or run past them where possible.
As a heads up, there is also a Lying Figure in the kitchen that circles the central counter; again, stealth past them or run past them.
In the main office still, you will find a safe with keypad, some Employee Rules to read, and a marked Fuel Canister you can read.
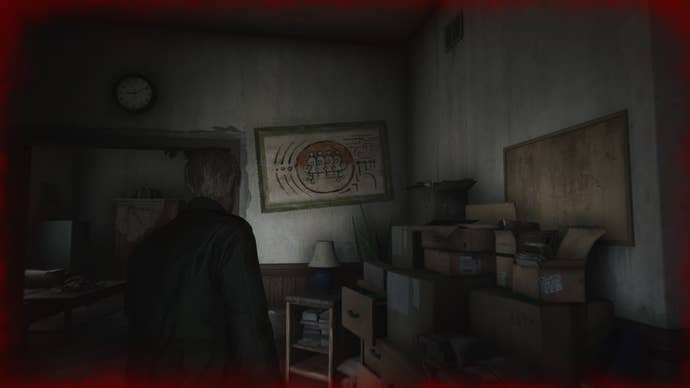
Head to the Manager’s Office on your map first to find the Gem Box puzzle. While facing it, look at the painting on the wall up ahead; you need the pattern in the middle of the Gem Box to match the painting, but first, we need three coloured gems to do that with.
- You will find the first Gem in a box on a dresser in the Manager’s Bedroom.
- The second Gem is found on one of the kitchen counters.
- The third Gem is inside the freezer in the Freezer Room.
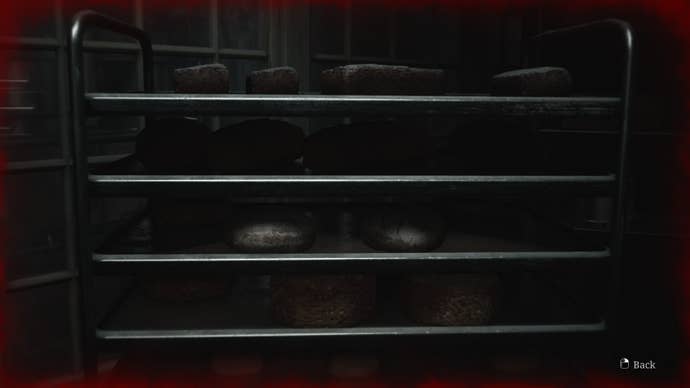
On top of that, a hidden achievement can be unlocked by interacting with the bread-shelf in the Kitchen.
Once you have all three Gems, it’s time to return to the Manager’s Office and place them in the Gem Box so that the symbol on the box matches the painting in the room.
If you’re struggling, on Standard difficulty puzzles, you want the blue and green gems to be on the left-hand side, with blue on top, and green below it. You then want the red gem to be adjacent to the blue gem, but on the right-hand side.
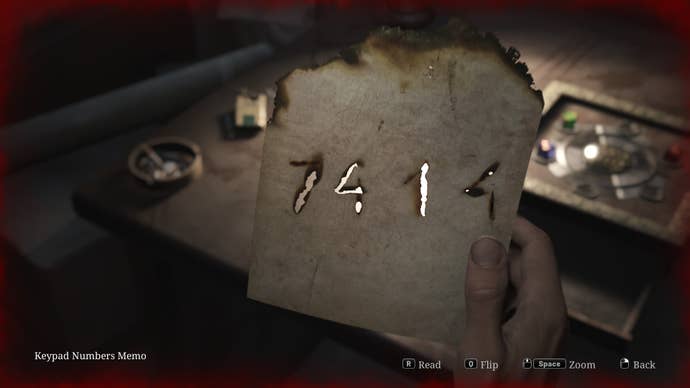
The drawer beneath the box will open to reveal a code burnt into some paper: 7414.
Return to the safe and keypad in the main office, and input the code. You will then collect the Videotape, and the Basement Key.
Exit the room via the door with the dartboard, and enter the stairwell just across the hall from it. Go downstairs to the Basement.
Another Mandarin lurks here, but fortunately only the one. Make your way to the Maintenance Room on your map first, and retrieve the Pump Valve from the desk.
Next, enter Liquor Storage and go through the gap in the wall. The Boiler Room has a burst pipe; attach the Pump Valve we just collected to the pipe beside the door and turn it.
In the Boiler Room, grab the Venus Tears Bar Key from the pipes in front of you as you enter.
Exit, and retrieve the Pump Valve again before using the key to unlock the door to Venus Tears Bar’s Kitchen.
In the next room, attach the Pump Valve to the pipe here and turn it again. You can now enter Venus Tears Bar, where you will find a save checkpoint and the Little Mermaid Figurine on the floor in front of the jukebox.
There’s also a cabinet of fishing tackle here that you can look at, if that’s your thing.
Before we return to the hotel’s Lobby, head back to the Employee Elevator to collect your stuff. Then head to the Lobby and place both the Cinderella and Little Mermaid Figurines in the Music Box.
To solve this puzzle, you need to spin the four discs here so that each Figurine has a route to one of the doors, so look carefully at how the lines align with one another and where they lead. Once that’s done, press the button in the right-hand, lower corner to test the route.
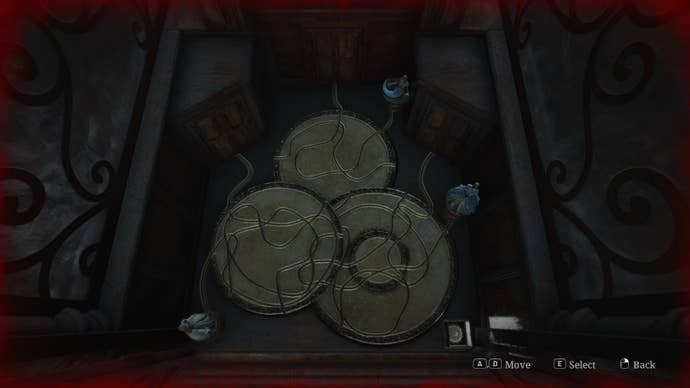
After successfully doing that, you are presented with three poems and three keys; you need to turn each key a number of times that corresponds with the poem. The poems will vary slightly, depending on your puzzle difficulty, but the answer — how many times you should turn each key — is in all of them.
Depending on your difficulty, the solution is as follows:
- Light Puzzle Solution - Turn the first key seven times, the second key two times, and the third key once.
- Standard Puzzle Solution - Turn the first key seven times, the second key five times, and the third key once.
After turning the keys the correct amount of times and pressing the gold button below them to continue, you will get the 3F Corridor Key.
Open the 3F Corridor using the key, and then enter Room 312 finally.
- The Observatory Room beside Room 312 is locked. In New Game Plus, after retrieving both Broken Key Parts and combining them to get the Dog Key, you can use the key here to unlock the Dog ending.
- Similarly, if you have the Blue Gem in New Game Plus and enter Room 312, a sci-fi sound effect will play. Provided you interacted with the Blue Gem in your inventory at Saul Street Apartments’ rooftop and Rosewater Park’s pier prior, you can interact with the Blue Gem here to unlock the UFO ending.
- If you have White Claudia in your possession, drink this to unlock the Bliss ending.
When you’re ready, pop the Videotape into the video player beside the TV. Sit back and enjoy the cutscene, where James finally realises the reality of what he’s done, and why he is here in Silent Hill.
Post-cutscene, you’ll find yourself having been transported to the decaying Otherworld Hotel.
To continue our Silent Hill 2 walkthrough, take a look at our Otherworld Hotel guide.
For more on Silent Hill 2, take a look at our spoiler-free review of the remake.

