Silent Hill 2 Toluca Prison guide
Teething with Spider Mannequins and more, here's how to get through Toluca Prison in Silent Hill 2.
After dealing with the horrifying Brookhaven Hospital and making your way to Silent Hill 2’s Historical Society, you’ll soon find yourself in Toluca Prison. This place is very dark and honestly, one of the more terrifying portions of the game, so brace yourself for what’s to come.
I’d also prepare to start using your ranged weapons a little more while here. You should hopefully have plenty of handgun ammo by now; you’re going to need it. Without further ado, here’s our Silent Hill 2 Toluca Prison guide.
Silent Hill 2 Toluca Prison guide
After meeting with Eddie again and entering Toluca Prison in Silent Hill 2, advance forward into the Armory area.
Here, there is a save checkpoint. You can also grab the Toluca Prison map as well as some Rifle Rounds. The Rifle is fortunately locked in a gun cabinet, but the Gun Cabinet Notice on the table beside it mentions that the Witness Checkpoint has a spare key.
From here, enter the Chapel and collect the Heaviest Weight from the altar there. There’s also a diary in the Vestry to read.
Next, advance into the prison. You’ll notice that the place is incredibly dark, and that there are red levers around the place which temporarily turn the lights on. While you don’t need to use these, I recommend doing so.
If you haven’t realized already, Spider Mannequins lurk on the walls of the prison and won’t hesitate to lunge at you. Having the lights on makes them more visible and significantly easier to shoot down with either the Handgun or the Rifle, when we have it. That said, these enemies are easy enough to run past. Just be sure to dodge if you hear them scream, as this means they’re about to attack James.
I recommend doing a sweep of the area to collect supplies and have James label your map; this doesn’t need to be anything intense as there’s nothing important for us to grab here just yet, but just doing a lap of the area will ensure that the various, important doors in the prison are labeled for you.
With that out of the way, go east along the Block B corridor and out of the double doors to come to the Yard. There is another save checkpoint here that I recommend using every time you return here.
Interact with the box in the middle of the yard and some scales will be revealed, with various symbols that match the symbols shown on the metal doors around the prison: Hornless Ox, Eyeless Boar, Headless Serpent, and Wingless Dove. There’s also a sword symbol in between them.
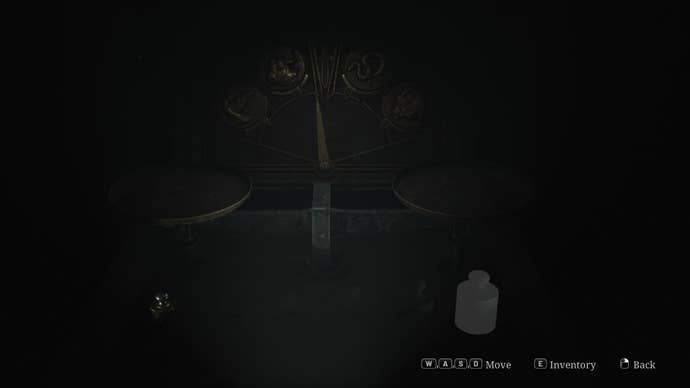
While in the prison, our goal is to essentially collect various weights and position them on these scales to unlock each of the doors, one at a time. So, first things first, place the lighter weight on the left scale, and the heaviest weight on the right scale. This unlocks the Headless Serpent door, so head on over there.
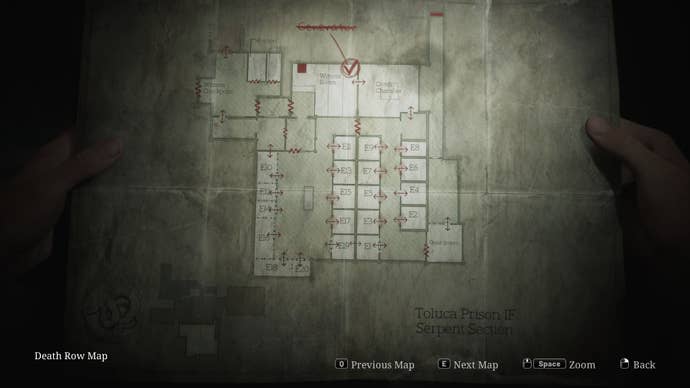
Silent Hill 2 Toluca Prison Serpent Section
Now in the Serpent Section of Toluca Prison, make your way to the Witness Room. You will find a save checkpoint here and a fusebox with a note.
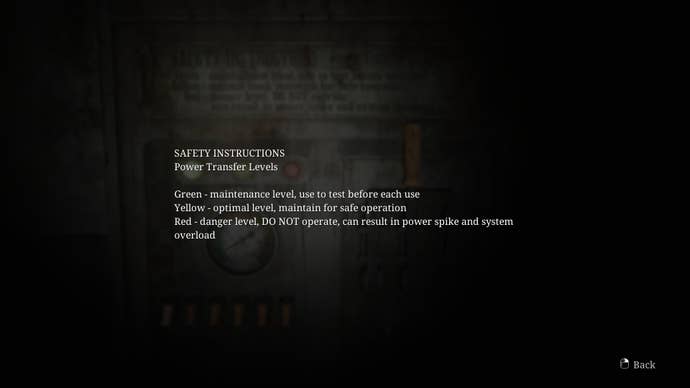
To get the Fusebox working (or not working, in this case), you need to flip the switches until the power level is on red. Then, pull the lever. This will open up the Death Chamber, where you can collect the Medium Weight from the execution chair.
You’ll now find that all of the cells in this section have been opened.
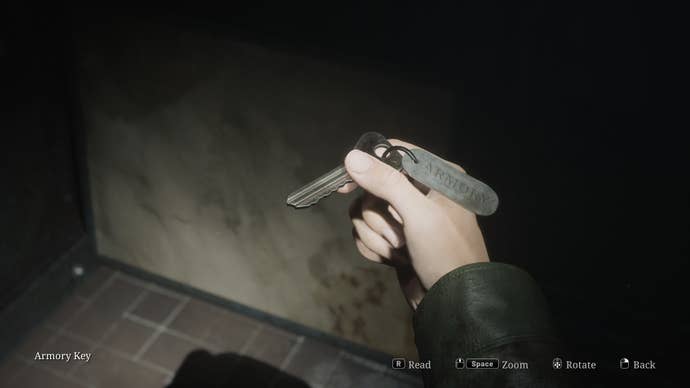
Go to E1 and break the wall in the cell to access E19. You will now be able to reach the Witness Checkpoint, where you can collect an Execution Report, the Armory Key, and read an excerpt from a book about Toluca Lake.
With that all done with, we can return to the Armory on 1F and retrieve the Rifle at last. This will make light work of any Spider Mannequins that trouble you.
Return to the Yard. This time, place the light weight and heaviest weight on the left scale, and the medium weight on the right scale. The Hornless Ox door will now be open, so head on over there.
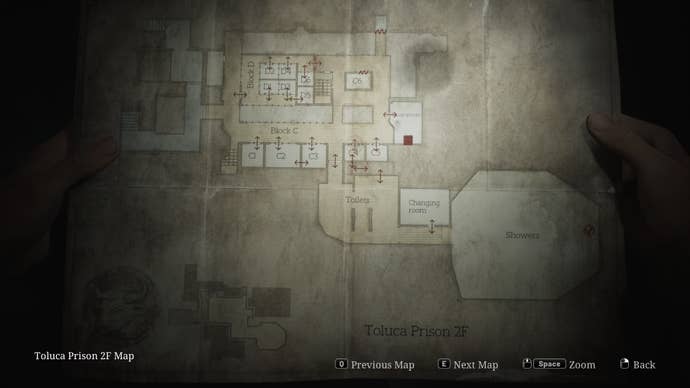
Silent Hill 2 Toluca Prison 2F
Through the Hornless Ox door, you will be able to reach 2F of Toluca Prison. While exploring the area, you will find that C4 requires a key; we’ll get to that soon.
Head to the Guardroom to find a save checkpoint, journal entry, and the Block D Key inside the desk drawer. Then, enter Block D.
Enter D5, where you will find a Threatening Note and the Shiv Key. You can use the Shiv Key to access C4, and can then crawl into the toilets from here.
Continue through this hall to reach the Changing Rooms and Showers. You will find a Paranoid Note and Crumpled Note along the way.
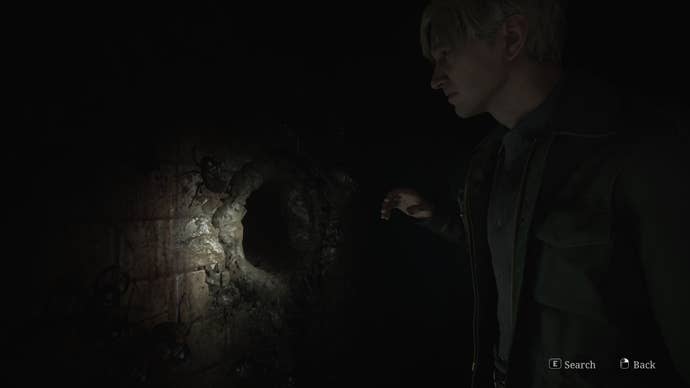
In the eastern-most point of the Showers, there’s a hole in the wall to thrust James’ arm into, where you will collect the Heavy Weight. After collecting it, a bunch of enemies will spawn, so by all means flee back to 1F and return to the Yard next.
This time, we need to place the medium and both heavy weights on the right scale, with the light weight on the left scale. The Eyeless Boar door opens next. Head on over there.
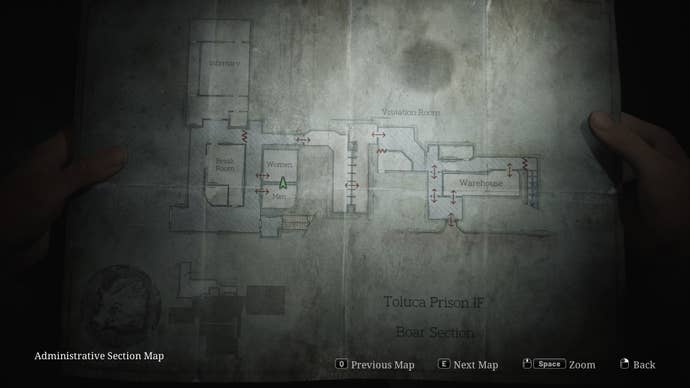
Silent Hill 2 Toluca Prison Boar Section
Now in the Boar Section of Toluca Prison, read the journal on the desk just up ahead, then make your way to the Visitation Room.
There will be a Prisoner’s Letter here, and a broken window you can jump through. You should soon come to a locked stairwell with a note that suggests the nurses have a spare key.
Now, we want to head to the Infirmary next, which surprise surprise, is full of Bubble Head Nurses.
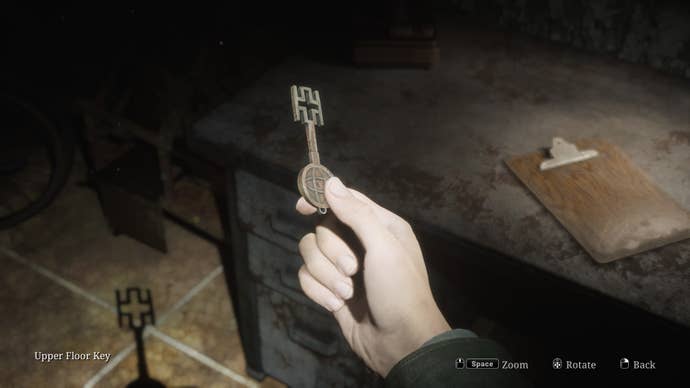
In the back of the room, retrieve the Upper Floor Key from the desk. Return to the stairwell from earlier and head up to the Warden’s Office.
In the office, you’ll find a typewriter with paper that reads “SICK” over and over again. Go ahead and use the typewriter to type “SICK” out for yourself. The drawer will open and you can collect a Light Weight.
With that in our possession, return to the Yard. Next, place the lighter, light, heavy, and heaviest weights on the left scale, and the medium weight on the right scale. Last, but not least, the Wingless Dove door will be opened.
Silent Hill 2 Toluca Prison Basement
The Wingless Dove door in Toluca Prison will lead you to the Basement. First things first, enter F9 and break the wall to access F10. There is a ladder in here that provides a shortcut to 1F, but don’t use it just yet. Exit via F9 again.
Crawl into the small room south of F15 on your map next. A notice on the wall here mentions F6, and you can interact with the power supply in here to open up both F5 and F6.
Exit and enter F4 to check out a cell with various paintings from the original game: Woman in Flight, 436 People at a Recital, and Burning Man. Head to F6 afterwards to retrieve the Lightest Weight, and to read the confession on the wall.
After collecting the weight, the door will lock, but don’t fret. After some spooky sounds, the door will soon unlock again.
Now, head to F10 via F9 and use the ladder to return to 1F. You know the drill, head to the Yard.
Things in the Yard will have changed slightly now. Behind the scales, there is a stone carving of two Pyramid Head’s and a person hanging from a noose. Before we can interact with that properly, we need to return to the scales and position our weights so that the arrow points at the sword in the center.
To do so, place the Lightest, Medium/Bloodstained, and Heaviest weights on the right scale. Place the other weights on the left scale. If successful, you will get the Execution Lever. Place this into the small opening in the ground that is in front of the stone carving.
At least, the Toluca Prison Yard Execution puzzle is revealed.
Pull ye but once on a rope’s frayed end.
Choose the one justified from among the damned.
Seek out their tales, think upon each sin,
Or let blind fate choose. Let the judgement begin.
You are then presented with twelve cards. Six are already placed, and we must match the remaining six with them. Then, we need to determine which one’s actions we think are justified.
Below are the six cards, followed by their associated cards in bold. This is what is presented to you on Standard difficulty puzzles. On Light difficulty, these stanzas will be shorter, but you still need to pair them with one another.
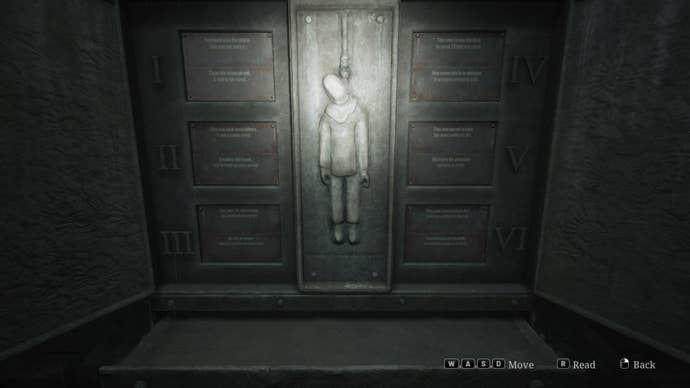
1. For your grace I do not plead,
For the flames I did set free,
Sisters shrieked and children cried,
No one made it out alive.
I watched them burn, I heard them cry,
I felt a soothing warmth inside,
It felt so good, I cannot lie,
And for my bliss, they had to die.
2. The wealth of others I did take,
The seventh statute I did break,
And yet my deeds I don’t regret,
I had my reasons, that is that.
The reason, if I have to say,
Was to survive another day,
To them, it was a loaf of bread,
To me, a cherished step ahead.
3. I took the child, you are quite right,
Carried her off into the night,
She did not scream, she did not bawl,
I was her father, after all.
Forgive me, child, for I have failed,
To save you from her wretched ways,
She whom I loved, who gave you life,
A monster hiding in plain sight.
4. Once the sun has ceased its reign,
I cut through the rusty chain,
Pushed the door and snuck within,
Filled my pockets to the brim.
I departed with great haste,
Leaving not a single trace,
Ever faithful to my creed,
All is right which feeds my greed.
5. Mommy dearest, mommy sweet,
Your love for me was so deep,
“Why, oh, why?”, you shouted out,
When my knife pierced through your heart.
You were, oh, so kind to me,
Filled my heart with joy and glee,
In the end, it was for naught,
“Why, oh, why?”, you ask. Why not?
6. I waited long, I bid my time,
I waited to commit my crime,
The man appeared, he saw me not,
A bloody end is what he got.
In truth, I did not hesitate,
As my blade sealed the poor man’s fate,
He knew the rules, they are quite clear,
Go against me, your end is near.
Once all twelve cards have been paired together, you then need to decide who the justified sinner is and interact with their noose.
In this instance, the solution I came to was noose number #2, though this puzzle appears to be slightly randomised. The poems can have slight variations, and the Roman numerals each poem appears beside may differ, so pay close attention to this.
That said, if you accidentally come to the wrong conclusion, you’ll be thrown into a room with some enemies — but also some supplies — so it’s not all bad. You’ll be able to exit into the Yard and try again.
James will wind up in some kind of morgue after interacting with the correct noose. Advance ahead and jump down the hole, and jump down the second hole following this.
Once you come to, and ride, the elevator, you’ll find yourself in the Labyrinth.
To continue out Silent Hill 2 walkthrough, here’s our Labyrinth guide.
For more on Silent Hill 2, take a look at our spoiler-free review of the remake.

