Silent Hill 2 Brookhaven Hospital guide
In pursuit of both Mary and Laura now, it's time to pay a visit to Brookhaven Hospital in this Silent Hill 2 guide.
After having made your way through the likes of Rosewater Park, Moonlight Grove, and the Reverse Theater in Silent Hill 2, you will find yourself at the intimidatingly large Brookhaven Hospital in pursuit of Laura. If Silent Hill 2 hasn’t managed to scare you already, your time in Brookhaven Hospital and beyond will definitely manage to do so.
Consisting of three floors, a basement, and countless different rooms, here’s our Silent Hill 2 Brookhaven Hospital guide to help you bring James a little closer to finding Mary.
Silent Hill 2 Brookhaven Hospital guide
To kick our Silent Hill 2 Brookhaven Hospital guide off, follow Laura into the hospital and collect the map from the leaflet stand in the lobby. Familiarise yourself with the various floors and their layout, making a note of where staircases are; we’ll be using them often.
Enter the Security Office next to find some Shotgun Shells and an empty gun cabinet. Then, enter the Reception Office to find a key locker that requires a code, as well as a save checkpoint. You will also find the Key Locker Note here, which mentions Examination Room 3; that’s where we’ll find our code!
Smash the window of Examination Room 3 next and jump inside. In the small room between Examination Room 3 and Examination Room 2, there is a note in the desk drawer that reads, “Nurses. Doctors. Trees.” on Standard puzzle difficulty.
On Light puzzle difficulty, the note will reveal two digits of the code, and then read “Doctors.” Both notes are referring to photographs in the lobby of the hospital. You need to look at the photographs and count how many respective nurses, doctors, or trees are in each of them to reveal your code, or the final digit, depending on your chosen difficulty.

The Key Locker Code solution is as follows:
- Light Puzzle Solution: 287
- Standard Puzzle Solution: 724
Return to the Key Locker and input the code to receive the Basement Key. Then, enter the stairwell south of Examination Room 3, and following the brief cutscene, head down to the basement.
Down here, there’s a generator in need of fuel. Enter the Boiler Room down here to collect an Empty Fuel Canister, and then enter Laundry Storage. Move the cart here to below the ledge and climb into the next room. Then, use the fuel tank here to turn your empty canister into a Filled Fuel Canister.

Now, you can return to the generator and fill it with fuel. Once that’s done, turn the generator on and you’ll find that the hospital elevator now has power!
Hop in the elevator and take it up to 2F. As you arrive, a cutscene will play and Maria will go to rest in C5.
- Whether or not you check on Maria in this room throughout the rest of your exploration of the hospital can influence the ending you receive.
In C3, you will find a save checkpoint. You will also find that the hospital contains plenty of Bubble Head Nurse enemies, who are quite brutal in melee range. If you don’t fancy using handgun ammo on them or simply running past (seeing as these guys can now travel and enter new rooms, unlike the original game), remember to dodge their swings.
If you venture over to the Nurse’s Station, you will find a keypad in need of a code, as well as note mentioning that we can find the code in the Doctor’s Lounge. We’ll come back to this later. Similarly, there are some puzzles in the Director’s Office worth checking out (as well as another save checkpoint), but we’ll also come back to these later.
While we are here, head to the Women’s Locker Room next. Interact with the teddy bear in there to acquire the Bent Needle, and collect the Shotgun from the locker. While having the shotgun is nice and all, I recommend using melee weapons or your handgun for now and saving your Shotgun Shells for later.
With that out of the way, head to the Nurse’s Lounge on 2F to retrieve the L1 Key. Use this to open and enter L1, where you’ll need to move a cart to a ledge in the back corner of the room. Climb over and enter the Utility Room, where you’ll be able to climb into the walls. This will lead you back to another part of 1F.
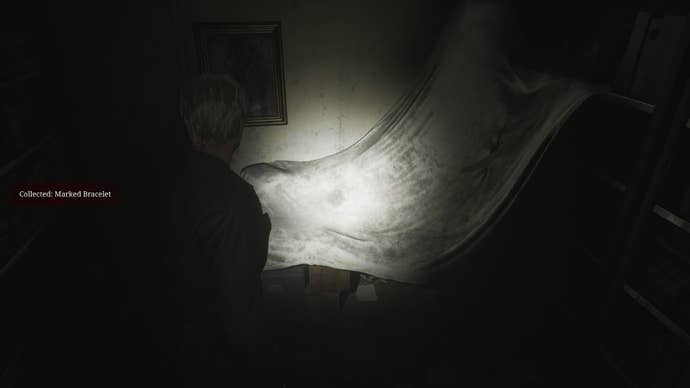
From here, crawl into the Medical Records room, where you can collect the Marked Bracelet from beneath some junk in the corner.
Next, head to 3F using the stairwell that is near the 2F Nurse’s Lounge. There will be a save checkpoint at the top of the stairs, and you can interact with the door beside it to see Laura.
Enter D2 to read some Observation Notes, and if you try to enter D1, you will find that it has a combination lock that we don’t yet know the code for.
Break the window of Examination Room 5 next, and head inside to collect the 1F Inner Ward Key from the desk.
You can also enter the X-Ray Room here to check out one of the upcoming puzzles we have to solve that involves the X-Ray Viewer, but if you fancy saving yourself two minutes of time, simply head back to 1F and use the 1F Inner Ward Key on the double doors in the lobby.
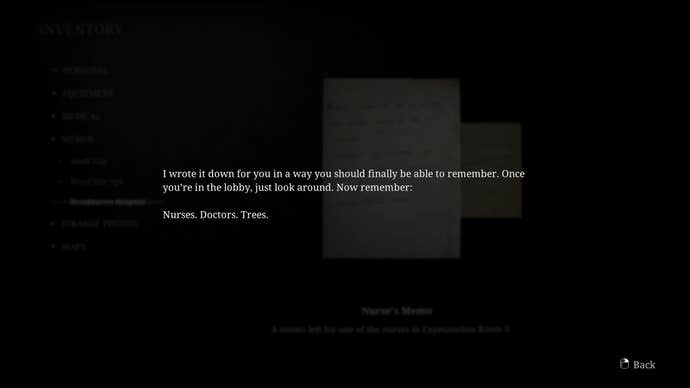
Make your way to the Doctor’s Lounge to find a note that reveals the combination for the keypad at the Nurse’s Station; it’ll show the numbers as circles, and the direction you should tap the code in. Ultimately, our code is 3578.
You know the drill! Return to the Nurse’s Station and input the code. Once inside, retrieve the Moldy Radiograph from the bathtub.
Next, go to the Garden via the Dayroom and Pharmacy, which are both now accessible. Run past the enemies in the Garden to come to the Pool, where there is a locked pool pump.
- In New Game Plus, if you collected the Rusted Key from the bowling alley earlier, you can retrieve a small chest from the gazebo in the hospital's garden. Combine this with the Rusted Key to get the White Claudia drink, and save the item to use in Room 312 of Lake View Hotel later if you wish to unlock the Bliss ending.
Enter the Shower Room at the back of the Pool to collect some Medical Tube. Then, go down the ladder and into the Kitchen to collect some Mold Remover. Return back to the Pool.
Before we continue, combine the Bent Needle with the Medical Tube. Then, head back into the Pharmacy and use your new contraption on the drain here. You will receive the Maintenance Key.
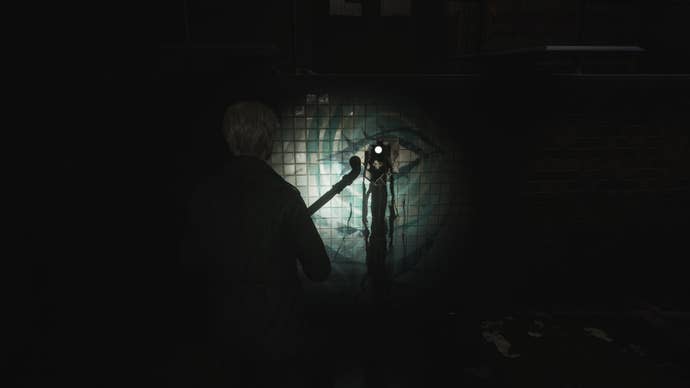
Return back to the locked pool pump and use the key to unlock it. You’ll then be able to interact with the pump and drain the pool. Go into the pool following this, and use your melee weapon to smash the eye drawing. Then, interact with it to collect the Bloodstained Bracelet. We’ve just one more bracelet to go!
Go into your inventory and combine the Mold Remover with the Moldy Radiograph next, leaving you with a Cleaned Up Radiograph. We now want to return to the X-Ray Room on 3F.
Here, you can collect the X-Ray Memo and another Radiograph from the bed. Then, interact with the X-Ray Viewer and place both of the Radiographs that you have found. You now need to arrange these accordingly, using the marker stains on the viewer to help you align them.
Once aligned correctly, a code will be revealed to you: 4, 37, and 12.
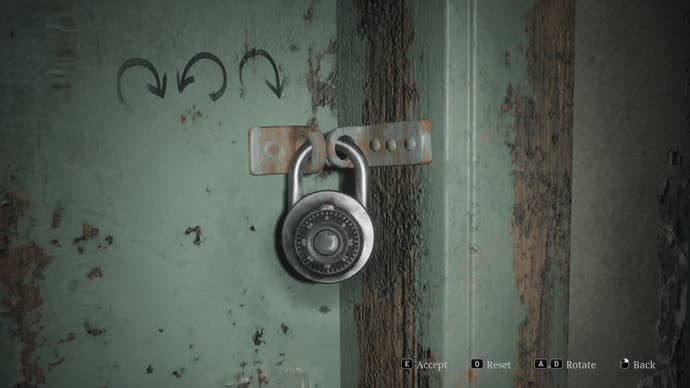
This is the code needed for the combination lock on D1’s door. There will also be a small drawing beside the lock that details which direction you should turn it as you input your code. 4 to the right, 37 to the left, and 12 to the right.
Once inside, interact with the bed to collect the Filthy Bracelet.
Now, it’s time to return to the Director’s Office! Place all three bracelets on the hand in here, and rotate them so that the numbers on them are all aligned. These will also need to be in a specific order, with the Bloodstained Bracelet at the top and the Filthy Bracelet at the bottom. Check out our bracelets puzzle guide for more help.
When properly arranged, you will be given the Director’s Storage Room Key, but make a note of the code shown on the bracelets before entering: 92, 45, 71.
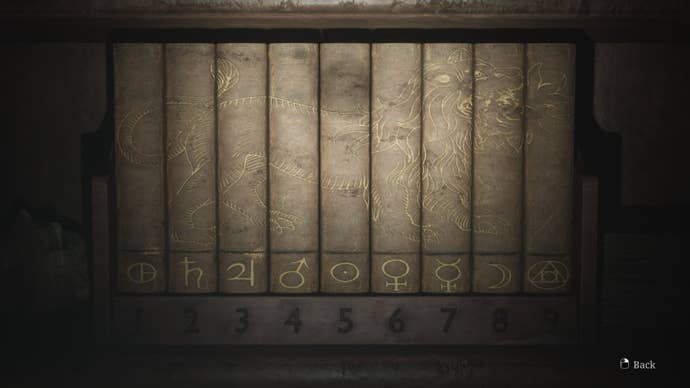
Inside the Storage Room, collect the button from the table and then interact with the bookshelf. You need to then arrange the books so that the image of the lion is revealed, which will allow us to work out the Director's Office safe code. Then, we need to do a little bit of code-cracking. Each number in the code we acquired earlier - 924571 - corresponds with the symbols shown on the books, and these symbols then need to be input on the safe that is on the other side of the Director’s Office.
I recommend whipping out some pen and paper to work this one out and draw the symbols that you need to input. Though, the answer is shown in the below image. Alternatively, if you’re familiar with astronomical and alchemical symbols, the code is: Philosopher’s Stone, Saturn, Mars, Sun, Mercury, Earth (this symbol misses the left line, however).
After successfully opening the safe, you will get the Rooftop Key. Return to 3F and head to the rooftop.

Explore the rooftop here to collect an Easter egg and some supplies. When you’re ready to move on, enter the rooftop building and read the diary entry here. Then, exit.
Pyramid Head will appear, quickly sending James crashing down to an unexplored part of 3F.
Continue along the hall to run into a cutscene with Laura. Once it concludes, you’ll find yourself in a boss fight with Flesh Lips.
In the original game, you fought three of these in a tiny room. Now, you fight one Flesh Lips in a larger room, but they’re a lot more menacing this time around. They’ll disappear into the ceiling and pop out at intervals, where you’ll want to use the shotgun to fire at them. Flesh Lips is pretty fast, so you want to be quick to fire once they appear.
After a few shots, Flesh Lips will jump to the ground and start using its rusted, metal casing as a weapon; they’ll have metal legs to walk around on that they’ll swipe you with. Keep dodging and shooting its fleshy side where you can, and swap to the Handgun if you run out of Shotgun Shells.
Once the fight is over, you will be transported on a gurney to the Otherworld Hospital. That’s right, it’s Brookhaven Hospital in a state of rust and decay, and it’s significantly scarier…
To continue our Silent Hill 2 walkthrough, take a look at our Otherworld Hospital guide.
For more on Silent Hill 2, have a look at our spoiler-free review of the remake.

