Metroid Prime Remastered Chozo Ruins Part 3 | How to beat Flaahgra, and where to go after
Time to go and grab the Varia Suit.
At this point in Metroid Prime Remastered, you'll be well acquainted with Chozo Ruins and the annoying enemies its home to, mainly wasps and beetles. The good news is, we're nearly out of here... for now. Our next job as Samus is to scan a dozen Runes, retrieve the Charge Beam and Varia Suit, and attempt to get out of here.
Part 3 of Chozo Ruins will also see Samus face off against unruly plant, Flaahgra, and running in circles around it is no easy feat. So, without further ado, here's our guide to Part 3 of Chozo Ruins, and how to beat Flaahgra in Metroid Prime Remastered.
Metroid Prime Remastered Chozo Ruins Part 3
You’ll have finished Chozo Ruins Part 2 by saving in the Gathering Hall. From this room, there’s only one door left for us to go through, which will take us to Watery Hall Access.
In Watery Hall Access, there’s another Missile Expansion to be found by, you guessed it, blasting a wall. After that, continue into the Watery Hall.
In this room, we need to locate and scan four different runes to ultimately open the gate in here. The locations of the four runes are pictured below:
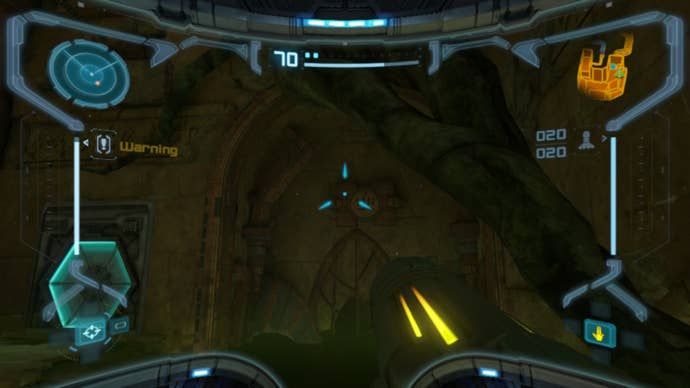
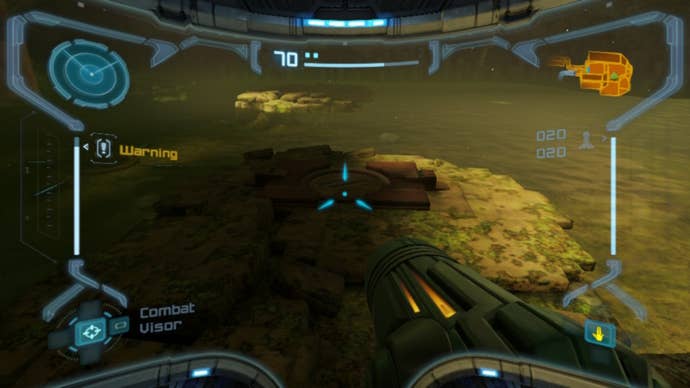
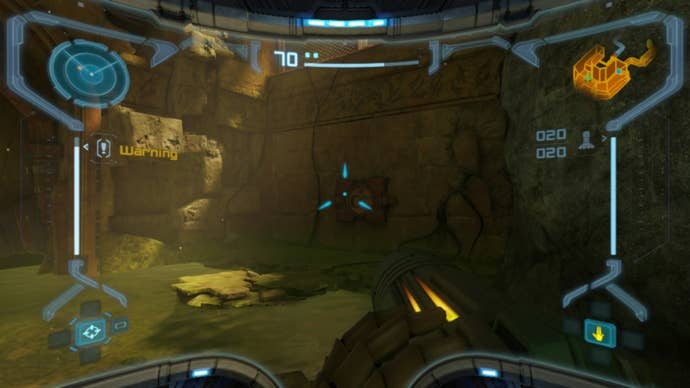
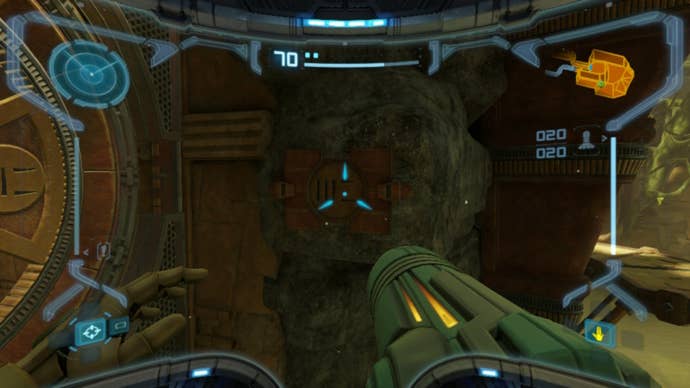
After scanning these four runes, scan the fifth rune on the gate. Now, you can pick up the Charge Beam.
After grabbing that, return to the Arboretum, where there just so happens to be another four runes that need scanning. Again, all four of these are pictured below:
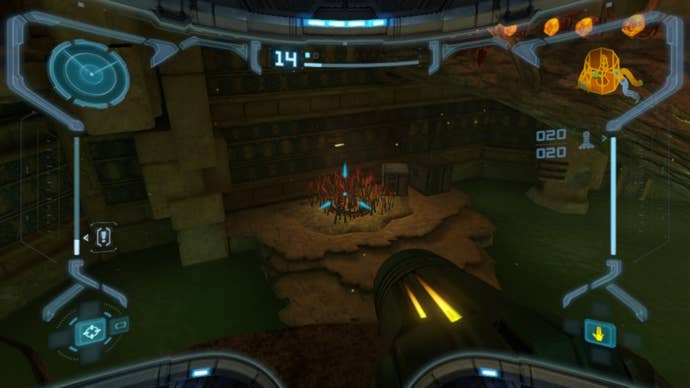
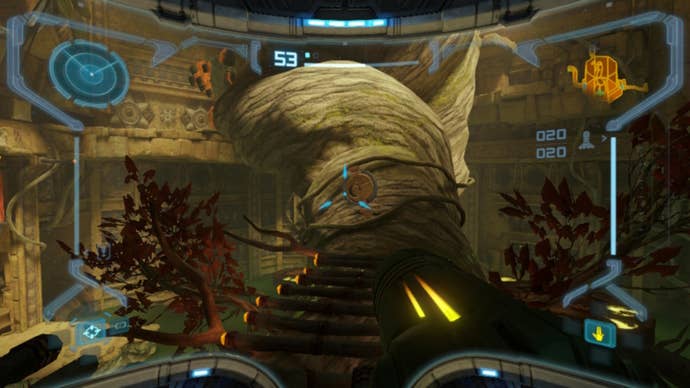
From the bridge, continue scaling the room and going higher by changing into the Morph Ball.
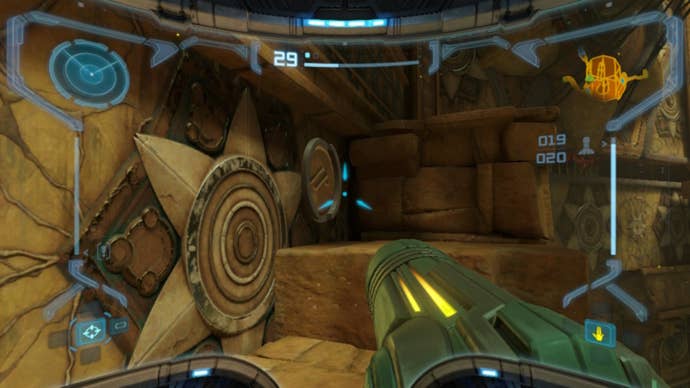
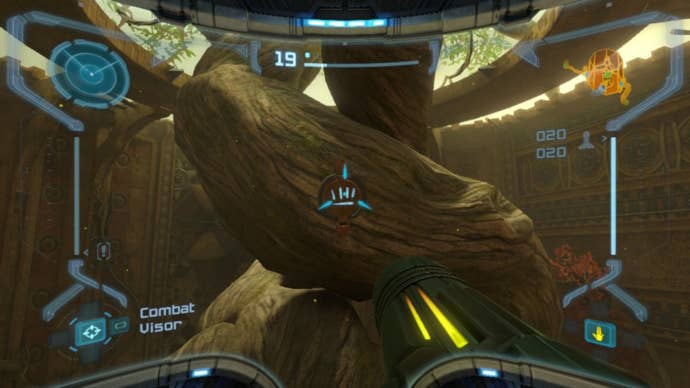
These will then open the locked door up at the top of the room. Use a Morph Ball Bomb and head through the tunnel, then blast the door and continue going until you reach the Sunchamber. Now, you’ll face off with Flaahgra.
How to beat Flaahgra in Metroid Prime Remastered
As per usual, you’ll want to scan this enemy. Now, with this boss, shooting it won’t actually do any damage, but will stun them temporarily. You’ll then need to fire at the red button below the heating panel that is above Flaahgra.
Once this is flipped completely, Flaahgra will collapse, and you’ll get a lovely look at where its roots once where; change into the Morph Ball, roll into one of the crevices here, and set off a Morph Ball Bomb.
Now, for the next portion of this fight, there’ll be two red buttons to target. Stun Flaahgra by firing at it first before trying to take on the heating panels, or else Flaahgra will simply put them back in place. With both panels flipped, repeat the Morph Ball Bomb process from earlier.
Next, there’ll now be three heating panels to target. Take care of those, set off another Morph Ball Bomb, and repeat the process with four heating panels. Then, voila, Flaahgra is dead. Now, you can retrieve the Varia Suit.
Where to go after beating Flaahgra in Metroid Prime Remastered
Head through the other door in this room into Sun Tower Access. Continue into the Sun Tower and watch out for bombs.
In the Sun Tower room, jump down and take on the horde of wasps. Continue into the next room and go left into Vault Access.
Change into the Morph Ball and take the elevator, then roll into the next room. Here, you’ll need to use the Morph Ball Bomb to blast the two locks in the room to smithereens; this’ll require some tactical Morph Ball jumps, including a double-jump.
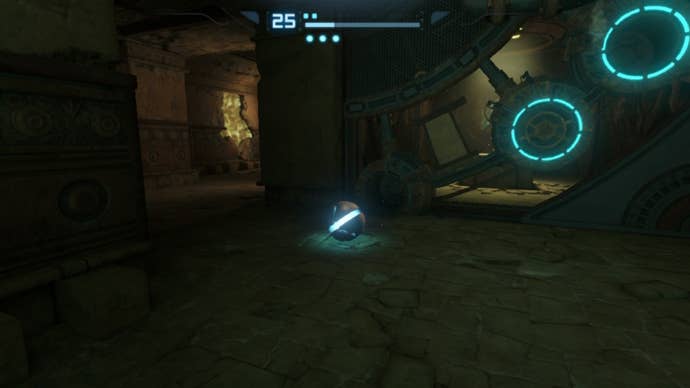
With both locks destroyed, the vault will be opened, and you can grab another Missile Expansion.
Head through the next door into Plaza Access, and continue on into the Main Plaza again for a free Energy Tank.
From here, we want to go to Transport Access North, which means going back to the Hive Totem and changing into the Morph Ball to roll through another tunnel. Make sure to save along the way using the Ruine Nursery Save Station.
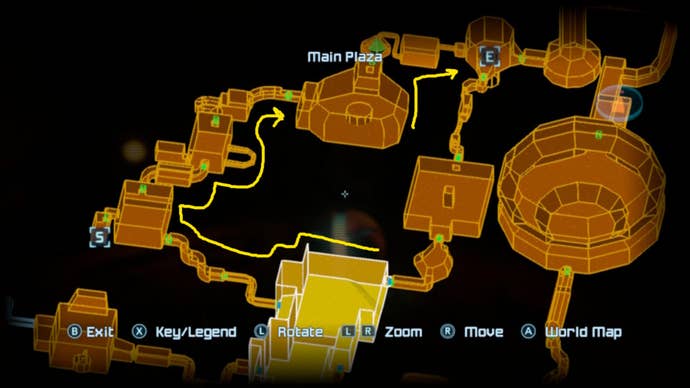
Once at Transport, scan the panel and hop in the Hologram to travel to Magmoor Caverns North.
We won’t be here too long, however, as it's almost time to head to Phendrana Drifts and meet Sheegoth.
For more on Metroid Prime Remastered, take a look at the rest of our walkthrough:






.jpg?width=291&height=164&fit=crop&quality=80&format=jpg&auto=webp)
