How to beat Divine Beast Dancing Lion in ER Shadow of the Erdtree
Ready for Shadow of the Erdtree’s first major boss? Well, you will be after this guide to beating them.
FromSoftware is no stranger to conjuring up interesting boss fights. Whether it’s Dark Souls, Bloodborne, or Elden Ring, the developer appears to always have some sort of trick up its sleeve to give players a fun, challenging time, and boss fights in Shadow of the Erdtree are no different.
And Shadow of the Erdtree’s first Remembrance boss, Divine Beast Dancing Lion, definitely sets the tone for the rest of the expansion.
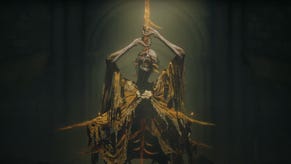
This strange beast, which (if you look carefully) appears to be a bunch of dudes in an extravagant lion suit, has an impressive move-set to match its appearance. Utilizing all manner of elemental damage, here’s our guide on how to beat Divine Beast Dancing Lion in Shadow of the Erdtree, to help you navigate his range of abilities.
There are, of course, spoilers ahead for the Divine Beast Dancing Lion boss fight, but that’s it! We also give you a few pointers on what to do following the fight, but we warn you beforehand.
How to beat the Divine Beast Dancing Lion in Shadow of the Erdtree
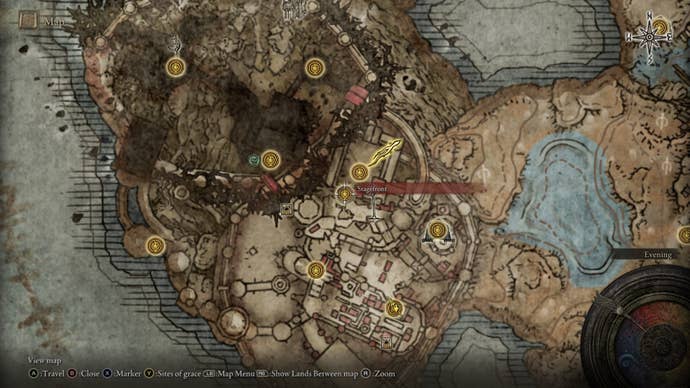
When you first approach Divine Beast Dancing Lion’s arena in Shadow of the Erdtree, which is situated at Belurat Tower Settlement, there is the option to summon Freyja. Note that summoning Freyja will increase the health pool of the Divine Beast, but having Freyja available to take aggro for you can be useful.
Additionally, you can forgo Freyja altogether and, of course, use your own Spirit Ashes to help take aggro during the fight. Using summons is entirely up to you, and you can use Spirit Ashes alongside Freyja, or use neither whatsoever.
If you do use summons, we found the Mimic Tear and Greatshield Soldiers to be two strong go-to summons during the DLC; I personally used the Mimic to help me stack bleed during this fight, but the Greatshield Soldiers - given that there’s four of them - are great for keeping the Divine Beast’s attention away from you.
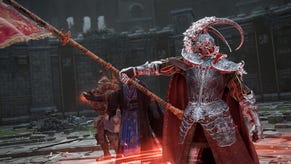
The Divine Beast is best compared to Maliketh in terms of how agile and mobile the beast is. They’ve a large moveset, multiple phases (all within the same health bar, don’t worry) utilizing different elements, and they can be hard to fully prepare yourself against given the different types of damage it can dish out.
We recommend the Dragoncrest Greatshield Talisman first and foremost, which enormously reduces your Physical damage taken. Then, we also recommend equipping either the Boltdrake Talisman +2 (as a heads up, a +3 version can be found later in the DLC) or the Bull Goat Set to negate some Lightning damage.
Last, but not least, we recommend equipping some Thawfrost Boluses. You likely won’t need them if you keep your distance during the Divine Beast’s Frost phase, but it’s useful to have them to hand just in case you do end up with Frostbite.
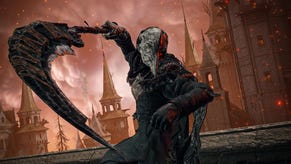
Preparations aside, once you first enter the Divine Beast’s arena, he’ll be using Physical damage only to begin with. Typically, he’ll fire projectiles of debris at you that are easily avoided, but he can sometimes run straight at you and begin to bash you about. During this phase, you can expect the boss to mainly use his body - a range of bashes, slams, and flips - to deal damage.
Divine Beast Dancing Lion Phase 1
For the beginning of the fight, you want to dodge into or past the Divine Beast’s attacks, rather than away. This keeps you at a close enough distance to attack whenever there’s an opening, but does require that you keep a careful eye on the boss’ next move. He’ll often flip, charge at you, spew debris around him, and slam to the ground.
When the Divine Beast is spinning around spewing debris, it’s a pretty good time to take a step back and breathe - consume flasks or apply buffs etc. - if that’s what you need. But prepare for him to come flailing towards you again soon enough.
There’s also a critical move to look out for here that sees the Divine Beast rearing its head; this might seem like a good time to attack initially, but you ideally want to wait this one out and dodge its mouth as best you can when it lunges towards you. During this attack, it’ll lunge towards the target - Tarnished or summon - in an attempt to catch them in its mouth. If caught, and if you don’t have plenty of Vigor to compensate, Divine Beast will literally chew you up and spit you out. I had around 52 Vigor during this fight and just managed to survive the attack within an inch of my life, so watch out for it!
Divine Beast Dancing Lion Phase 2
Once the Divine Beast reaches around 60% of its HP, it unlocks elemental abilities, meaning it can now utilize Lightning, Wind, and Frost, and will switch between them every 30 seconds or so. You’ll know when the beast is changing form as it’ll leap into the air, screech, and then reveal which element it is using in a rather dramatic fashion.
Fortunately, the moveset remains largely the same, but there’s a few things to bear in mind. During its Lightning phase, the Divine Beast will often conjure strikes of lightning around the arena (and around itself). You can easily avoid these by looking at the floor to see where the lightning is going to hit and watching your footing, and dodging away rather than towards the beast.
While using Frost, the Divine Beast is capable of unleashing a Frost stomp attack that creates spikes on the floor as it slams to the ground. This dishes out Frost in the area surrounding the beast and can quickly build up if you’re constantly in close-range of it. Whenever you see the beast go up into the air and begin conjuring frost around it, you want to prepare to roll away - or jump - as it comes back into contact with the ground. And if Frostbite builds up, use your Thawfrost Boluses!
Finally, there’s the Divine Beast’s Wind powers. This one is most similar to the Physical phase, but the beast is now capable of launching gusts of wind at you, which will almost definitely knock you over if they hit you. With this phase, you want to be extra careful as the Divine Beast swoops in at you or charges at you, as a tornado is likely to follow; much like the Physical phase, try dodging into the Divine Beast to avoid its gusts of wind.
Divine Beast Dancing Lion Phase 3
When the Divine Beast has just 25% HP left, it’ll continue to switch between Lightning, Wind, and Frost moves, but it’ll do so at a much quicker pace now. Its moves remain the same as the previous phase, but you’ll just need to be more prepared for the element the Divine Beast is using to be rapidly switched up.
The main thing to remember is to dodge into Frost and Wind, dodge away from Lightning, and don’t hesitate summoning; Freyja is great!
In my experience, if you’re on the Divine Beast and do not let up, it can somewhat be forced to stay in the same phase by the looks of things. In my successful attempt, the beast stayed in its Frost phase from 40% HP onwards while me and Freyja took turns flailing at it.
What to do after beating the Divine Beast Dancing Lion in Shadow of the Erdtree
In this section of our Divine Beast Dancing Lion boss fight guide, we’re going to give a few pointers on what to do and where to go next in Shadow of the Erdtree. There are no spoilers ahead, aside from what you can get from Divine Beast Dancing Lion’s Remembrance.
If you hand in the Remembrance of the Dancing Lion at Roundtable Hold, you can choose between Ash of War: Divine Beast Frost Stomp or the Enraged Divine Beast charm, which is a Talisman that raises the potency of storms. You can also duplicate Remembrancesin Shadow of the Erdtree if you fancy.
After that, be sure to explore what else Belurat Tower Settlement has to offer if you haven’t already. Definitely grab the Storeroom Key in Belurat and speak to the Hornsent Grandam, and don’t forget to grab the Well Depths Keyand explore what’s in the sewers of Belurat too.
Once you’re done with Belurat, it’s time to make your way to Castle Ensis to the east of Gravesite Plain, but there’s also the nearby Belurat Gaol to check out, too.
For more on Shadow of the Erdtree, take a look at how to get the south Map Fragment, how to skip the upcoming boss, if you fancy, and our guide to Moore's quest.


.jpg?width=291&height=164&fit=crop&quality=80&format=jpg&auto=webp)
