Dishonored 2 M03: The Good Doctor - Addermire Institute
This is the first real elimination mission in Dishonored 2. Have a nice time.
- Addermire Institute key objectives and items
- Investigate Sokolov’s Location
- Disable the Watchtower
- Investigate the Crown Killer (optional)
- Eliminate the Crown Killer
- Sunken Wreck (special action)
- Abandoned Basement (special action)
- Release the Hounds! (special action)
- Three Witnesses (special action)
- The Counter-Serum (special action)
- Painting: Duke Abele’s Propositional State
- Painting: Anton Sokolov in Subtractive Light
- Painting: I Regard Her, Inside And Out
- Blueprint: Combat Sleep Dart Formula
- Blueprint: Memory Vapor Distillation
- Rune x 5
- Bonecharm x 4
- Outsider shrine x 1
General layout and tips
The key flow of the mission is to enter Dr Hypatia's office to find a key, enter Recuperation, eliminate the Crown Killer and disable the Watchtower while picking up at least one of three clues to Sokolov's location as you progress; everything else is optional.
The map above shows Addermire Institute; here's a zoomed-in version without the key if you want a closer look.
Addermire Institute is laid out like all hospitals everywhere: a nightmare of interconnecting wings. It all makes sense once you understand there are two main divisions - east and west - spread over four main floors, all accessible via a central lift and staircase.
To get to the central staircase you must travel from the carriage station through the main lobby and a wall of light. The wall of light can be deactivated, or circumnavigated by a side path.
There are three paintings, two to three blueprints, five runes and four bonecharms on offer - and a whopping five special actions. Sunken Wreck is completed within seconds of arriving at Addermire Institute. Abandoned Basement and Release the Hounds can be completed any time after you have access to the central staircase. To complete Three Witnesses you must fulfil all optional objectives before eliminating your target. Counter-Serum is only available on the non-lethal elimination track.
Walkthrough
Immediately after arriving, face back along the tracks and look down to spot a ledge to your left. Drop down and go under the platform to collect a bonecharm. Before you go any further, jump into the water and swim out to the sunken ship near the pylons supporting the carriage tracks. It’s only minor loot, but it completes special action Sunken Wreck.
Return to the starting platform by climbing the rocks. Go up the stairs deeper into the level and you’ll see an ornamental pool. Turn the crank on the left side to raise the water level. If you have Possession, you can become a fish and swim up a pipe to reach deeper into the area. We’ll assume you prefer to walk.
Up ahead is a large semi-circular terrace with a mail room or something at the centre. There are three guards here. Facing into the level with the carriage at your back, one will wander off to the right to stand gazing into space as you begin to approach. The other two have a chat in the station, then one goes out to take up a mirror position on the left while the other stays in the office - not difficult to deal with. There’s some raw whalebone down at the very end of the right path you should grab while you're here.
There are two paths forward now. We recommend fully exploring them both for loot, story content and optional objectives - but you can pick either of the two sections below and meet us at Staircase if you prefer.
Main Lobby and wall of light: direct route
Directly ahead is the main lobby. There are three guards and a wall of light. If you want to clear it out, zip up to one of the light fixtures with Blink or Far Reach to get a good view. Take the guard in the office first and leave the elite till last for best results. When they’re down, take the bonecharm from the cabinet by the entrance, several bits of loot from display cases, Document: Unfinished Letter to Captain Ramirez, and most importantly Painting: Duke Abele’s Propositional State from right by the wall of light.
Zip up to the gallery above the wall of light, where the cable leads, and disable it by removing the whale oil if you want to. Don't go back down, though - continue along the upper level to a doorway and pass through. Collect Document: Safe Code from a desk on your right as you advance. In this area you’ll find a standard safe with some minor loot and a combination safe - use the code you just picked up, and you’ll unlock the Blueprint: Combat Sleep Dart Formula. This is important: grab Document: Letter to Lieutenant Valienete near a messy corpse at the far end before leaving - it's part of a special action.
Return to the entrance to the main lobby to continue, or skip down to the Staircase section if you don't care for the loot in the next part.
Kitchens and dining hall: indirect route
Explore the semi-circular terrace; at the end of the arm that didn't have any whalebone you can drop down to a rocky path which leads around a corner. When it peters out look up for an open shutter and climb through to a kitchen. The civilians in the kitchen aren’t really a problem and there’s nothing worth looting here, so just let them finish chatting and break up, then pass through hugging the left wall to come out at the door to the dining hall, where four guards and an elite guard are hanging out.
How you get through here varies, but I ended up going back into the kitchen to knock out both civilians, which made it very easy to take out the guard who goes round and round the room by ambushing him right by the door. I then used noise to lure one of the two guards in the centre away, which made it easy to sneak up on each of the other three individually. That said, make sure to move the bottle of flammable liquid from the table before you grab the one who’s eating! He often bumps it and sets himself on fire.
With the room clear, grab the rune and loot the room and nearby toilets, and open the doors back to the main lobby and onwards to the central staircase.
Central Staircase
Grab the map off the board to update your objective and grok the layout. The staircase here will be your orientation point form hereon in, so get used to it - we're on Floor 1 right now. The dining hall side is west, and the unexplored wing is east.
Stay on Floor 1 and open the east door to enter the barracks and kennels area. Take the first door on your right to enter the barracks. There’s a guard asleep you can deal with, as well as Document: Journal - Corporal Valdez, and in the gap between two beds, Document: Unsent Letter to Family. There’s a guard in the central corridor teasing a dog, and another guard in the room opposite the barracks doing not much, along with an unconscious civilian for some reason.
There is plenty of minor loot and ammunition in these rooms, but the real prize is two pieces of raw whalebone in the room with the dogs. Opening the door is risky but only one wolfhound is awake by default; pop a sleeping dart in him and with luck the others won’t stir. This completes special action Release the Hounds! To be absolutely sure I wouldn't kill anyone, I grabbed all the guards and the single civilian and piled them up in the barracks, then shut both doors to the room, before I opened the dog doors - and I closed this wing off when I left. It worked.
There's one other direction we haven't explored on Floor 1 yet - the doors behind the stairs. They lead to your eventual exit point, so don’t bother for now: we have lots more to do. Approach the central stairs but be wary - sometimes a guard patrols down.
Floor 2
Go up one flight to Floor 2 and enter the west wing - the one above the dining hall. Explore the room, collecting the Blood Amber Cigar box, and take out the guard sawing planks near a blocked door. Smack the planks across the door to open it and collect some minor loot and consumables, if you like. Back out in the main area of this floor, sneak down to the far end and take out a sleeping elite guard.
Leave the east wing for now; the door is hard locked. There are two guards playing dice blocking the stairs up but you can ignore them if you like. Enter the elevator and climb through the hatch to stand on top of it. Push the button and when you get to the top climb out.
Rooftops and Floor 4
When you're safely out of the elevator shoot the red canisters on its cables with your crossbow: the noise will worry the guards but not alert them, and you won’t be seeing any for a little while so they'll get over it. It opens a path to the basement which we’ll check out in a little bit. For now, stay where you are and look for a rune and some loot on a little table.
Walk outside and jump to the next rooftop. Get down one level however you please, watching out for one guard and one elite guard, and explore the long building you just leapt to to find a room with an Outsider shrine; it rewards you with two runes.
On this same level, look for the tall narrow building - it’s the top of the central stairwell, and our eventual goal. But before you go inside, use the nearby rooftops and chimneys to get on top of it and steal a black bonecharm from a bird’s nest, along with some coing. Go back down and enter the building to find a door which gives you Document: Orders from Captain Ramirez. Enter Dr Hypatia’s office. Collect Audiograph: If Only I Could Do More, Document: Letter from Duke Luca Abele, Document: Letter from a Journalist, and Book: Dr Hypatia’s Notebook. This completes the optional objective Investigate Dr Hypatia’s Office. You should also collect Dr Hypatia’s Key, the Blood Amber Deck Prism loot item, and a gold ingot which is hidden on a bookshelf.
The next two sections are necessary for special actions, but optional if you're in a hurry; rejoin us at Recuperation.
Speak to Hamilton
We need to go down to Floor 2 but let's take a short detour. Rather than take the stairs, go outside and drop down between two wings to Floor 3, where there’s a windmill, so you can grab some raw whalebone. Don't worry about the east wing on this level; there's nothing but guards.
Continue on to Floor 2 (if those guards are still on the stairs, you can always zip right down to the main lobby and come back up). Open the locked door leading to the east wing on this level (again, being careful of those two guards if necessary) and take shelter as two guards chat. You have to be quick here as the guards may kill Hamilton. As soon as they stop talking, sneak up and take out the guard, then grab the elite. You can then talk to Hamilton.
Take Hamilton’s Quarters Key from the shelves behind him, then pass into the next room for Book: A Lecture on Bloodfly Fever. In the other lab room, look for Book: Beyond Black Spittle, by Ungar Poltomy and Document: Letter to Bloodfly Patient.There’s also a stack of ammo, consumables and some minor loot. Don’t bother with the other doors here yet; we’ll be back.
Return to the central staircase and climb all the way to the top, past Dr Hypatia’s office (use the light fixtures to get past the guards playing dice if you still haven’t dealt with them). Disarm the tripwire and two traps, then open Hamilton’s door. Inside, grab Blueprint: Memory Vapor Distillation and most importantly Book: Hamilton’s Diary. Take the bottle of flammable rum with you when you leave and drop it somewhere on Floor 3.
Basement
Now is as good a time as any to clear the basement. Take the central stairs all the way down to the bottom and then climb through the opening above the closed lift doors. Drop through the hatch of the busted elevator to reach the basement, then search the far left corner to collect Painting: Anton Sokolov in Subtractive Light, Book: Vera Moray’s Diary, Document: Vera Moray’s Belongings, a rune and a gold ingot.
To exit, crawl into the elevator, climb up through the hatch, climb up to level one and push the button to open the doors - or just exit through the gap at the top again.
Recuperation
Go to Floor 3. Before entering the west wing, Recuperation, explore the office are between the two wings for Document: Note to Recuperation Staff, Book: Last Entry in the Matron’s Diary and some minor loot. That done, open the doors to Recuperation with Dr Hypatia's Key.
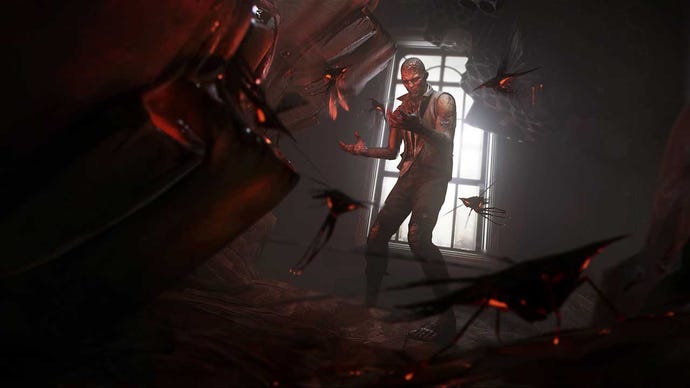
Recuperation is infested with bloodflies. If you can, use incendiary bolts and flammable liquid to take out nests, then slash the surviving bloodflies with your sword - it’s tough to avoid them altogether in here. You might not have enough fire stuff on hand to deal with every nest, unfortunately, so be conservative about which ones you need to take out, avoid stirring up the nests unnecessarily and use bodies as decoys if necessary. Be sure to pick up any blood amber that drops from nests.Try not to panic if you aggro a single swarm and run out of fire; just stay in stealth to avoid pulling more of them and advance, swinging your sword, to attack the nest.
You definitely want to destroy the first nest, which took two incendiary bolts when I did it, for the rune. Hug the left wall to enter a room with a bloodfly nest right on some raw whalebone and Book: Solarium Schedule. There’s a bottle of flammable rum in here, too - save it for a sec. Stick to the left path and look in each of the tanning booths; one leads to small room. Use your bottle of rum on the nest on the roof here so you can safely grab the bonecharm. It’s not a great idea to open the door on the other side of the room; there are two nests there which makes things tricky.
Continue along the left path to grab another bottle of rum, which will help if you want to clear the two nests which will be on your right. The good news is the door on your left as you approach them is the exit; get out and slam it shut to end the problem.
Go down the stairs on your left as you enter the next room and at the bottom proceed to the end and smash the glass. Collect the corrupted bonecharm, Audiograph: New Orders, Painting: I Regard Her, Inside And Out, Document: Crown Killer Rampage Continues and Document: Sokolov’s Abduction.
Eliminate the Crown Killer
You may have come to some conclusions already but don’t act on them just yet. Speak to Hypatia in the central area, and collect some raw whalebone from the table with the dead body. Head into the back room to talk to Vasco and collect Audiograph: Sweet Innocent Hypatia. Vasco gives you a safe combination during the cutscene. Don’t worry - it’s saved in your Journal menu if you forget it.
Stay stealthy when the cutscene ends. Even if you want to take the lethal route with this elimination, it's worth fulfilling the optional objectives to unlock special actions and score more loot.
Sneak back to the central staircase (take the shutters near Vasco's sickbed to reach the docks, or just go back through recuperation) and go back to Floor 2 - where you met Hamilton. Take the door opposite the entrance from the central staircase and turn left. Collect Document: Reminder - Things to Buy and Book: Vasco’s Diary - Month of High Cold, 1850 from the desk, then enter the safe combination to grab Book: Counter-serum Notes.
Go to the room opposite the one with the safe and grab Audiograph: Counter-Serum, Book: Vasco’s Diary - Month of Nets, 1851, and the Base Serum item. If you missed Blueprint: Dispersed Incendiary in Karnaca, it’s also here.
Go to the bloodfly room and interact with the body near the door, then go back to the lab you found the serum in. Select “use base serum”, turn the bunsen burner on, and then wait a few seconds. Eventually you can grab the cure from the cup. Return to Hypatia in Recuperation.
The Crown Killer is quite a fierce fighter so whether you're going lethal or non-lethal it's best to surprise her. She is usually found in the lower area so if you go high you can drop attack her, or just drop down behind her for an easy ambush, as she completes her slow back and forth patrol between the main room and Vasco's sickbed.
If you take the non-lethal route, have a chat afterwards. Loot Vasco’s corpse for Document: To Whomever Finds My Body and take the opportunity to use the Heart on Hypatia; it's quite chatty on this subject.
Deactivate the Watchtower
The shutters near Vasco's sickbed offer direct access to the watchtower, or if you're gone somewhere else you can get there via the doors behind the central staircase on Floor 1; watch for the three guards in this area if you pick this route.
There are two guards on the upper docks watching over the watchtower, and one more who wanders around below occasionally. Take them out then zip over to the tower and remove the whale oil canister to allow Meagan to approach. Speak to her when you’re ready to leave and end the mission.
If you did everything we suggested in this walkthrough you’ll have completed all special actions and found all collectibles - nice.
