Destiny 2: Forsaken - How to get the Wish-Ender Exotic Bow
The Wish Ender Exotic bow is one of the best Exotic weapons in Destiny 2: Forsaken, so here's how to get it.
Wish-Ender is connected to Destiny 2’s very first dungeon, The Shattered Throne, so equip your most Powerful gear and jump into a Fireteam.
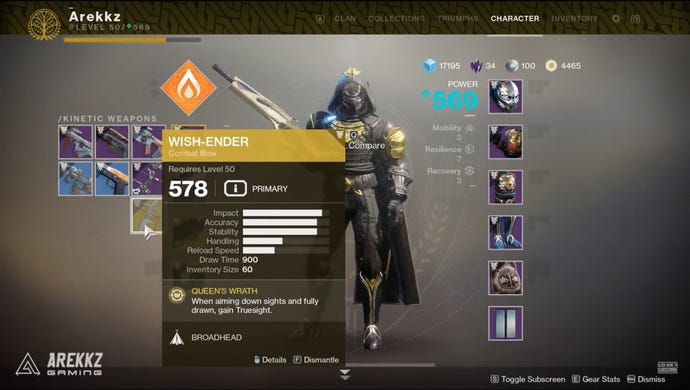
Wish-Ender has some pretty interesting perks, most notably that you can see through walls when you draw an arrow and can penetrate multiple enemies. It can also be used to destroy Taken crystals. Destroying these will give you Reverie Dawn armour pieces which granted aren’t the most powerful, but a reward is a reward.
This quest conveniently ties in with The Shattered Throne dungeon, which you must complete before you can unlock the quest for the bow. The Shattered Throne appears on the curse week, which is usually week 3, so you can track when you'll be able to get this Exotic weapon.
Once you’ve completed the dungeon, head to the Tangled Shore, through Four-Horn Gulch, then pull out your Ghost. You’ll see a Forsaken quest icon on the right. The icon will have a series of question marks beside it and the prompt “Prove your worth”. Interacting with this will spawn a mission, where you’ll follow the markers and kill a bunch of enemies along the way.
In the final room, three powerful Taken enemies will spawn, but they won’t be anywhere near as powerful as those found in the dungeon, so you can do this solo if you wish.
Upon killing them, three tokens will spawn: The Dreaming Token of Eriviks, Querim and Xavoth. You’ll then need to head back to the quest marker for The Shattered Throne and begin the dungeon again.
Head through the first section as normal until you reach the Labyrinth. Head left and follow the pathway. Once you’re outside, climb up onto the rocks so that you can climb on top of the statue and from the statue you’ll then be able to jump to the top of the tower.
At the back of the tower, there is an orb that you’ll use in this dungeon. Pick it up and jump back over to the head of the statue then over to the adjacent roof.
Once you’re on this roof you’ll see various statues with orbs in their hands, except for one. Head over to the orbless statue and interact with it.
As soon as you’ve placed the orb a boss will spawn, Theratos, Archersbane, so is a minotaur. Kill him, and another will spawn; kill that one to charge the first of your three tokens, which will become the Waking Token of Querim.
Complete the rest of the room as normal to progress to the next section with the narrow beams and Ogres. We’d highly recommend killing the Ogres first and then making your way to get the orb as they can one-shot you easily.
Cross the first beam in front of you, turn right and work your way to the back where an orb will be hiding behind a pillar. Once you pick up the orb, make your way back to the exit but instead go to the right where there will be another group of statues holding orbs. No boss will spawn but it’s still something you can to do to receive the bow.
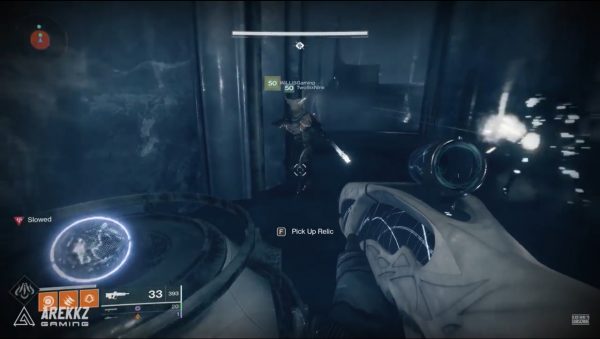
Go through the black field where you receive the Slowed debuff and take a right at the top of the stairs to find the orb. You’ll then need to make your way through this area carrying the orb and avoiding the Taken Thrall as best you can.
Jump out of the field and as soon as you drop down, you should take a right. You’ll find more of the statues to interact with and like before no boss will spawn and you’ll be able to do the next phase.
You then have to cross the chasm again, but instead of taking a right to the ogre boss you’ll see that the door ahead is now open. Once inside, a tonne of adds will spawn as well as a boss in the centre platform. Killing this boss will charge the Eriviks token.
You’ll then need to head back over to the Ogre boss as the final orb will spawn during this fight. Play it out as you did previously, only this time when the Ogres shield drops a Minotaur will spawn. Killing the Minotaur will see him drop a Relic, another orb.
If the exit to the room is behind you, turn to your right and head along the wall until you find the statue you can interact with and give the orb to. Adds will almost immediately spawn alongside another Ogre who thankfully doesn’t have a Shield Mechanic, but it can get pretty hectic quite quickly.
Killing this smaller Ogre will allow you to charge your final token, Xavoth. With this done, you simply need to finish the fight again. Once completed, head over to the statue where you made an offering, only this time the three bowls will have orbs in them. Interact with the statue to claim your loot, Wish-Ender.
You’ll also unlock the Triumph called Gimme that Bow, wherein you have proven yourself worthy to Sjur Eido, the Queen’s first Wrath. The perk you gain with Wish-Ender is called Queen’s Wrath which grants Truesight which is the ability to see through walls we mentioned earlier.
Wish-Ender is one of two previously missing Exotic items, the other being Malfeasance, an Exotic hand cannon. You can find our guide on how to get Malfeasance here.
Want more? Then check out our Destiny 2: Forsaken guide for more on the Season of Opulence and how to succeed in the Menagerie , how to farm Imperials, and how to get the new Pinnacle weapons and the Truth Exotic Rocket Launcher and Lumina Exotic Hand Cannon.
You can read more about what to expect in Destiny 2: Shadowkeep here.
For PC players, remember you need to link your Battle.net and Steam accounts before October 1 in order to play Destiny 2: Shadowkeep, so here's our guide on how to cross-save.


