Zelda Link’s Awakening: Catfish's Maw walkthrough and returning the Ghost
Once you leave the Angler's Cavern dungeon, you're freed out into the overworld once again. But on the way to the Catfish's Maw dungeon Link has some... ghost problems.
Now the Anglers Cavern is done, you can do whatever you like for a bit now - it's an ideal time to undertake some exploring or side quests. We actually want to wander around for a bit, because doing so gets Link a slightly spooky friend... a ghost!
Taking the Ghost Home in Link's Awakening
The Ghost will appear and give you some pretty obvious questions: he wants to go home. As it hangs around you the ghost will mention a few more things - it'll mention a house, and then get more specific and straight-up say that the house is down near the shore - so to the south of the Island, near the beach. There's two ways you can reliably reach the ghost's house: either by going down to the beach and heading hard east until you see some liftable rocks, or by going south from Ukuku Prairie and then heading West across a large gap that you can jump with the old Pegasus Boots and Roc's Feather one-two combo.
When you reach the house, which is nice and obvious, head inside. The ghost has a look around and then asks to be taken to its grave. This is obviously up towards the graveyard. If you've unlocked Manbo's Mambo, you can play that on your Ocarina and warp to Manbo's Pond - you can head west and south toward's the Witch's House, and then it's just to your west. Alternatively, backtrack to Mabe Village and back to the Witch's Hut, where you got the Magic Powder early in the game. The ghost's grave, as we said, is all alone just to the west. Once you get to the grave the ghost will recognize it, and then give you an Empty Bottle item before disappearing and leaving you on your own once again.
The owl will come and update you on your objective, telling you that you need to go diving in Martha's Bay in order to enter Dungeon Level 5, Catfish's Maw.
Gaining Entrance to Catfish's Maw
With your new handy flippers, you can swim and use that fact to gain entry into a variety of different places throughout Koholint Island. You can feel free to explore if you want - and before we go any further, we highly suggest that you take a small detour to Mabe Village and buy the Bow and Arrow. At this point you should have the cash for them - but if you don't you could steal them, hit up the Color Dungeon which is available to you at this point, or otherwise explore to pull together the Rupees.
When you're ready, you need to head to Martha's Bay. This area is east of the beach - so you can go to the beach and past the ghost's house, jumping the gap - or you can go east from Mabe Village to Ukuku Prairie and then head south pretty much immediately. You can't miss the entrance to the dungeon, either way - it lives up to its name as it's a giant Catfish head, surrounded by rocks that seal it in.
To get to the dungeon, look for a tile of water that's bubbling on its left hand side, flanked by rocks. Swim there, then dive underwater - that'll get you inside the rock formation and to the dungeon entrance. Head inside...
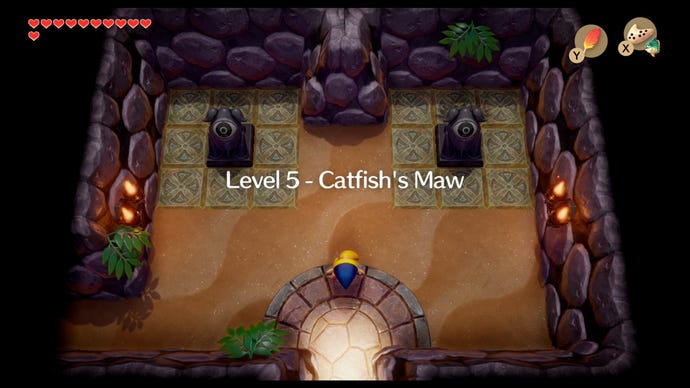
Catfish's Maw Walkthrough - Dungeon Level 5
We're at the halfway point of the core dungeons in Link's Awakening, and as such things are starting to get real here. This is a more labyrinthine dungeon to deal with, but luckily we're here to assist. From the entrance room, head west, then clear the room of enemies. Remember, you can only defeat the Iron Mask enemies by hitting them in the back, and you'll see them a lot in this dungeon. Head west again. When the enemies are dead in this room, another door west opens - head through.
Grab the Compass from the chest in this room. There's some enemies too - kill them if you want, then head down the nearby stairs. The dangling stone platforms on chains are pretty self-explanatory here - they're like a see-saw. Use the Roc's Feather to jump from them at the ideal time to make your way across the side-scrolling room in a little platforming challenge.
You'll end up in a room with a bunch of Stalfos Skeletons and crystals. Kill all the Stalfos, but don't leave the room. Instead, look at the blocks on the floor: plus the two top blocks left and right to make a perfect square of blocks. A key will drop from the skies. Grab it.
Now head back down the stairs, backtracking to the room where you got the compass, and then east one room. There's a door to the north - use your key and open it, then head immediately west, taking out the enemies on the way if you want. Kill the Iron Mask baddies in this room to open the western door, then head through. There's yet more Iron Masks in here - kill them, clearing the room, to spawn a chest with Catfish's Maw's stone beak. You can use the bottles to kill the enemies if you find that easier.
Now head east two screens back to the room with the crystals, then north. You'll be in another Stalfos room. Defeat them to make the door in the north open. In this room is a mini boss: Master Stalfos. This guy is a pain, but there's a trick: wait for him to swing up for an attack, then hit him. He'll collapse into a pile of bones; leave a bomb on that pile of bones to do some damage. Three rounds will do the trick.
With the Master Stalfos dead, take yourself out of the newly open door to the east. There's a chest here... and it's empty, emptied by the Master Stalfos. He's still alive, and he's being even more of a pain. Go north from the empty chest. There's blocks at a four-way junction here - push the middle block up and head to the west, the left. We don't actually want this room, however - turn around and head back to the junction room to find the block positions have been reset.
Now push the middle block to the right and head north. Once again turn straight back around to the junction - push the block again, and this time you can finally exit to the east. The Master Stalfos is in this room; use the same methods we did before to get rid of him. Once you're done, head west again, push the block to the left and then head north.
We're actually going to use this room this time. If you need more bombs for the next encounter with the Master Stalfos, there's 10 you can grab in the room to the east. Otherwise, beat the cloaked Stalfos and the star enemies in this tall room, then head north to the top of this room, then west. There's three green blobs in this room - you need to defeat all three to open the door to the north. You'll also need to push a block to reach the third blob, on the left side of the door. Take the northern door.
Here, again, is the Master Stalfos. Beat him. Once he's retreated again you can take the western exit to the next room, grabbing the Dungeon Map from the chest within. Once done, we need to backtrack all the way to the dungeon entrance... either on foot, using that map, or by playing Manbo's Mambo on your Ocarina to warp there. Our guide picks up there.
From the entrance, we're heading west - all the way west, back to the underground area with the see-saws, through there, and back to the room with the Stalfos, the crystals and the blocks we pushed earlier. West of here is the final Master Stalfos boss room; defeat him and he'll leave behind the item he stole earlier - it's the dungeon item for Catfish's Maw, the Hookshot - a classic Zelda staple. Now it's time to rip this dungeon wide open.
Backtrack to the third room of the dungeon, two screens west of the entrance. This room has a north-eastern exit behind some blocks. Take it, then head east. There's a chest across a long gap here - use your new hookshot to grab the chest and drag yourself over to it. This chest only has cash, but it's a great example of what you can do with the hookshot. Hookshot back over the gap by hitting the nearby block, then head west and north. Take the western exit straight away here, then once again go north.
There's a Beamos in this room shooting lasers at you and a floating arrow pick-up. On the right-hand side of the room, there's a point you can hookshot - and when you do, it creates a bridge for you. Ignore that for now, however - just head west. In this room there's multiple gaps and those slidey-slicey obstacles. You can't jump the gaps without getting sliced - but you can quickly hookshot all the way across. So do that! Head west into the next room, hookshot to the chest, clear the enemies and then open the chest to get a small key.
Backtrack to the room with the floating arrows and the bridge thing you can pull across on the eastern side. Pull it across and now head north. There's a locked block here - and you can unlock it with your key... and inside is another mini-boss... Gohma. There's a catch here: Gohma is actually an optional boss, and requires the bow and arrow to beat. If you don't want to do it, skip this step. If you've following this walkthrough you picked up the bow, however - so we want to enter. Unlock the block and enter that room, and in classic Zelda tradition hit Gohma in its eye with an arrow. Once Gohma is down, you'll get your portal back to the middle of the dungeon.
Leave the Gohma boss room from the bottom-right exit, then head south, back to the room with the beamos, the cool hookshot bridge and the floating arrow pick-up. From this screen head south a screen, east a screen, and then go north several rooms. You'll recognize this is where we first met Master Stalfos. Go east from here and then down the stairs we ignored before, through an underground area with Cheep Cheep fish enemies.
Head up the stairs to a new room, then east. The owl statue here as some key advice: "Dive under where torchlight beams do cross..." With that in mind, backtrack to where the stairs were, the old empty chest room. Now we're heading north, back to the four-way junction with the pushable block. Push that block north and now head west, then in this new room go north.
In this room there are a bunch of Tektike enemies on the water. Kill them, then remembering the Owl Statue's hint, jump into the deeper water and dive down. You'll go through a side-scrolling segment and then arrive into a room with another hookshot bridge. Pull it over, take the path and grab the Nightmare Key. It's almost boss time.
Backtrack through the side-scrolling area, then south and east from the room you emerge into. You'll be back in the block junction room. Push the block to the right and now head north. There's a chest in this area you can hookshot to get some rupees. From this chest, head east. Get some more hookshot action on here to cross a large gap and grab a small key. With that done, head back west and then hookshot the bridge in the north for another cash chest. Now hookshot to the left, and head to the bottom of this room and exit to the south, back to the junction block room.
We need to go south from the junction room - so push the block south, go east into the Master Stalfos room, then back to the junction. This time push the block left, and then head down. Easy. In the room to the south, head down the stairs, back through the room with the cheep cheeps, and back to the room where the advice-giving Owl Statue was. Ignore it, and head east, and keep going. There's a block to push - push it, and if the game routes you down the stairs, ignore it. Instead, unlock the key block. Hookshot on over the gap and then open the boss door.
The boss of Catfish's Maw is Slime Eel - and that's a pretty descriptive name. It's a slimy eel. It pokes itself out of holes in the wall, while its tail will get in the way from the middle of the room. When the head comes out of a hole with an open mouth, hit it with your hookshot. That'll expose a glowing weak point. Hit it. If the tail approaches, use Roc's Feather to jump over it.
Once the Slime Eel is defeated, it'll have some ominous words for you... but it'll also drop a nice shiny new Piece of Heart and the Wind Marimba, the latest instrument in your quest. That's the end of Catfish's Maw - but next you have to head to the somewhat creepily-named Face Shrine Dungeon - but of course, there's some tasks to complete before you do.
