Sekiro walkthrough part 5: How to reach Ashina Castle
It’s time to trudge ever deeper into Sekiro: Shadows Die Twice.
After defeating the legendary Gyoubu Oniwa, this time we’re looking at how to get into Ashina Castle and face off the giant Blazing Bull.
If you haven't already, confront the memory of Gyoubu Oniwa at the Shrine before you leave, this will give you a permanent boost to attack damage!
Ashina Castle grounds
To get started, leave the safety of the battlefield shrine and push open the giant gate in front of you, then head up the stairs. There’s an enemy just around the bend, so hug the rocks to the right as you climb the steps. Take him out, then grapple onto the roof of the building.
You’ll see two guards on the ground straight ahead of you. Turn to the right and look behind you, towards a tree until you see the Eavesdrop prompt. You’ll hear a rumour that Isshin has a grave illness, even with Genichiro around.
The gents talking will also refer to another mission, remarking that “Blackhat is fighting like a demon by the Serpent Valley side of the castle”, before saying that they better keep the wits about them if the Blackhat Badger is around.
Turn around to your left and jump down into the courtyard and go down the steps. There’s a guard and a few dogs waiting right at the bottom, so be as stealthy as you can. The fight could potentially alert the other two guards we saw that the start, and you’ll need to look for somewhere to hide.
Head back up the stairs and grapple on to the roof and wait a few seconds until the guards are no longer looking for you. Drop down and head to the bottom of the stairs that the guards are climbing. You should see a glowing item, which is a Ceramic Shard, that you can throw at an enemy to get their attention or to distract them.
You can throw the shard to lure one of the guards away, or sneak up behind one and one-hit him. Either way, you’ve got a quick fight on your hands. You can either go in the building afterwards or grapple onto the roof for an easy escape. A third guard is just inside the building, so take care of him.
We scaled the roof and you’ll be able to see a big guy with a mallet and a few other enemies down below. Go back to the doorway where you just killed the three guards and enter the building. Head outside and into the long grass to sneak up behind the first enemy.
Stealthily kill him from behind, then sneak your way behind the Sumo guy with the mallet. Once he’s fallen down, other enemies will run at you, so get ready for a brawl.
The trick with this guy is to take a dodge-and-stab approach. Watch out for that mallet because it could definitely one shot you if you’re not careful. Get in behind him as he’s swinging the mallet down to take a few shots at his back and remember to use your grapple if you need to nip away and heal.
Alternatively, you can just run away until he stops following - then return and stealth kill him once his back is turned.
Defeat him and he’ll drop a Mibu Possession Balloon and a Ceramic Shard. Once you’ve picked up your items, follow the path around and you’ll see some stairs to your left. Go up the stairs and go to the left to find some Scrap Iron that you can use to upgrade your Prosthetic Tool. If you look behind you at the tree, you’ll find a Fistful of Ash that you can use to distract enemies.
Jump back down into the courtyard and grapple to the roof of the archway over the stairs. There are two guards standing on the stairs below and you can Eavesdrop on their conversation. They talk about using “that thing” in battle and seem apprehensive.
Once the conversation is over, turn to your right and jump up to the building across. Head inside the room and you’ll find a Light Coin Purse beside the door. It contains sen and won’t be lost upon death. Jump back over to the roof you were on and attack the guards whichever way you like.
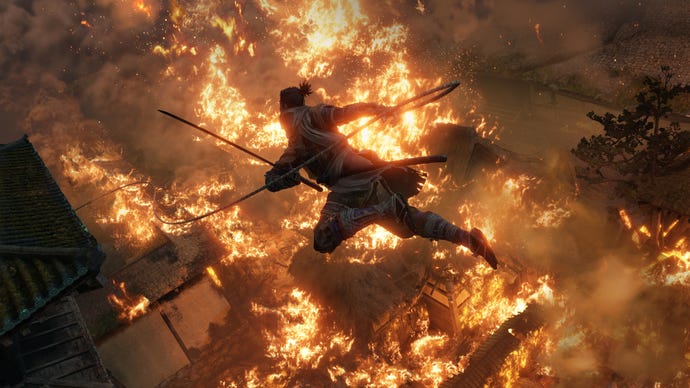
You’ll then reach the door to Ashina Castle. There are guards immediately inside the door, so use the tall structures to get a vantage point. At this point, things get a bit crazy. A giant Blazing Bull with a flaming barrel trapped in its horns will suddenly burst into the castle grounds, destroying everything it runs into.
Fight the Blazing Bull
The bull is a relentless attacker, but compared to the previous boss battle, this one's easier to muddle through. Like with most of the game, it pays to be aggressive. Get in close to the Bull's neck and flank, but be ready to dodge it's flailing attacks. If you try and back off too far, it'll just end up tagging and wearing you down with charges which are difficult to dodge.
Be wary of fire damage and how fast this beast can move. Get in behind it when you can and hack away. If you're finding the bull a bit intense, make use of the Shinobi Firecracker to scare the beast, just like you did with the horse in the last boss fight and then aim for the bull’s head using a charge attack.
Once defeated, the bull will drop a Prayer Bead. Offering four of these beads at a Sculptor’s Idol will increase your maximum Vitality and Posture. You’ll gain a Shinobi Medicine Rank 2 skill - which is very useful in the long run.
You’ll hear the door open and more guards will appear. They’ll immediately attack you, so act fast. Head into the next section and you’ll see a woman praying on the edge of the walkway. She’ll make a reference to the Senpou Temple on Mount Kongo where “a very special holy person lives”. You can pop your Balloon items from your inventory near this woman and she'll give you items, including sugar buffs and divine confetti.
At the end of the walkway is a Sculptor’s Idol, where you can have a wee rest before you next harrowing encounter.
From this bridge, you can go in many different directions, but with the attack damage buff that you received from Gyoubu Oniwa's memory it's time to finish off the Hirata Estate.
Sekiro guides
- Sekiro walkthroughs
- Sekiro walkthrough Part 1 - Yamauchi, General Naomori Kawarada
- Sekiro walkthrough Part 2 - Chained Ogre
- Sekiro walkthrough Part 3 - Find the Flame vent, Shinobi Axe and fight General Tenzen Yamauchi
- Sekiro walkthrough Part 4 - Find the Shinobi Firecracker and fight the horse-rider
- Sekiro walkthrough Part 5 - How to reach Ashina Castle
- Sekiro walkthrough Part 6 – finishing the Hirata Estate
- Sekiro walkthrough Part 7 – Ashina Reservoir
- Sekiro walkthrough part 8 - Senpou Temple, Long-Armed Centipede Sen'un
- Sekiro walkthrough Part 9 - Ashina Castle Upper Tower
- Sekiro walkthrough Part 10 – Where to find Lord Isshin
- Sekiro walkthrough Part 11 – Ashina Depths and Hidden Forest
- Sekiro walkthrough Part 12 – Mibu Village, Corrupted Monk Spirit, Screen Monkeys
- Sekiro walkthrough Part 13 – Sunken Valley, Gun Fort and Bodhisattva Valley
- Sekiro walkthrough Part 14 – Owl and Fountainhead Monk Cheese
- Sekiro walkthrough Part 15 – Finding a Persimmon and collecting the Frozen Tears
- Sekiro walkthrough Part 16 – Mibu Manor, Fountainhead Pot Noble and Dragon
- Sekiro walkthrough Part 17 – Clean up and Isshin Sword Saint Cheese
- Sekiro - best ending guide
- Sekiro skills and combat
- Sekiro - top combat tips
- Sekiro - best skills
- Sekiro - Boss guide
- Sekiro crafting and items
- Sekiro - how to remove Rot Essence and cure the Dragonrot
- Sekiro - crafting and upgrade materials guide
- Sekiro - Gourd Seeds and Prayer Beads locations
- Sekiro - Treasure Carp Scales Guide
- Sekiro - Mask Fragment Guide
- Sekiro - where to find more Divine Confetti and Snapseeds
